Introduction
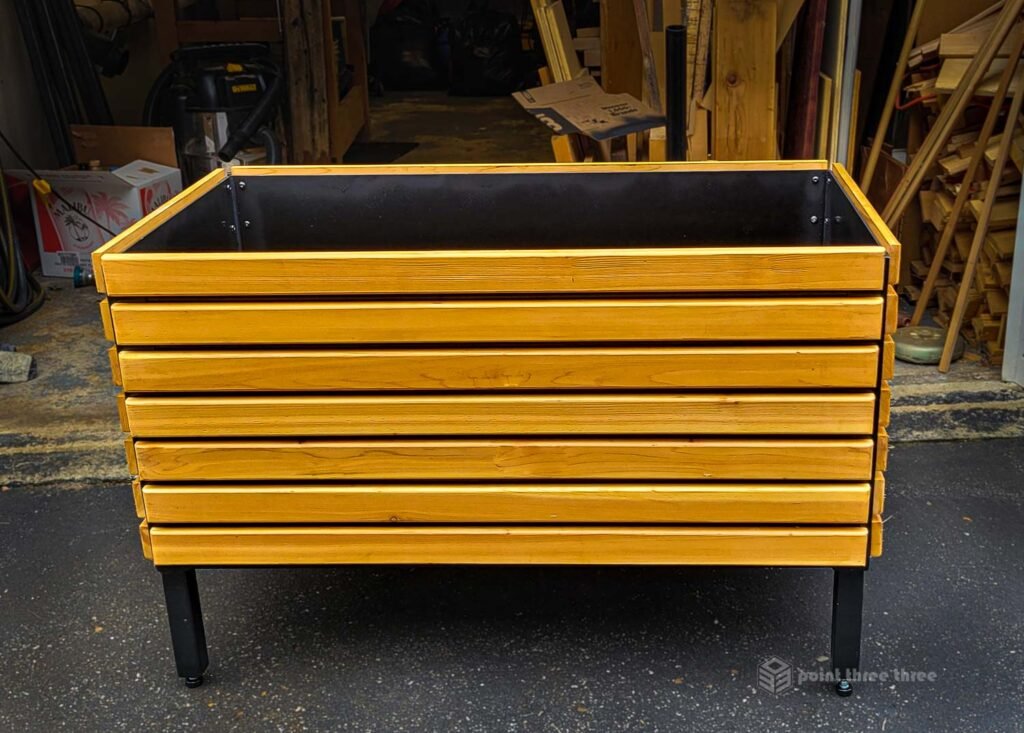
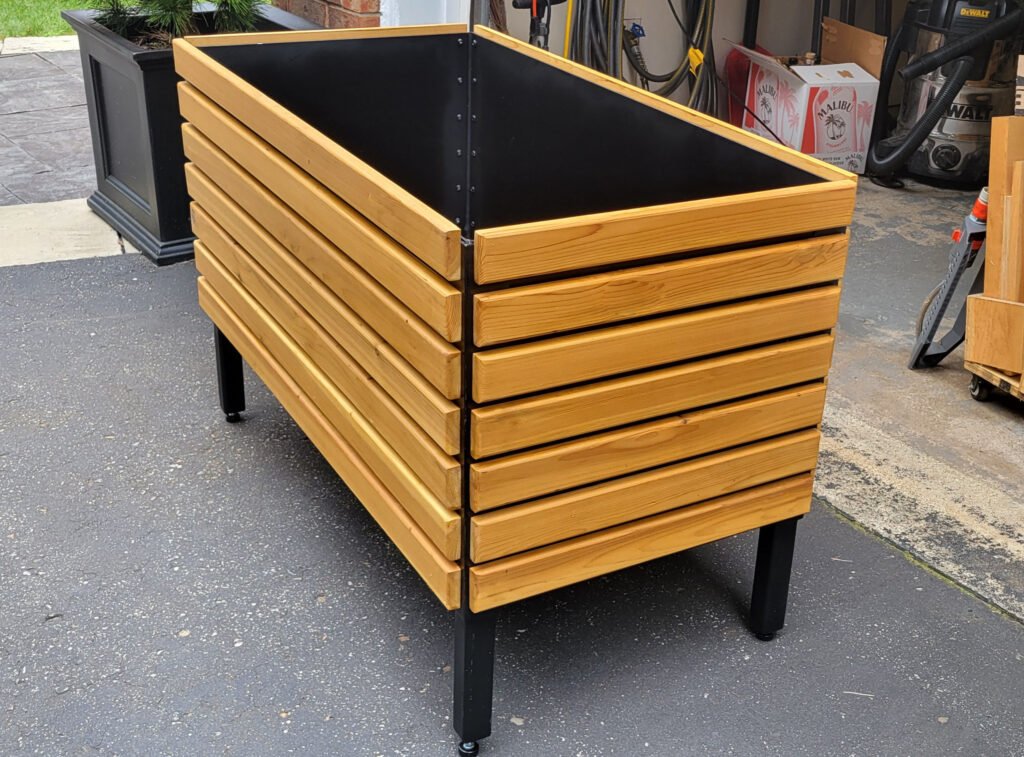
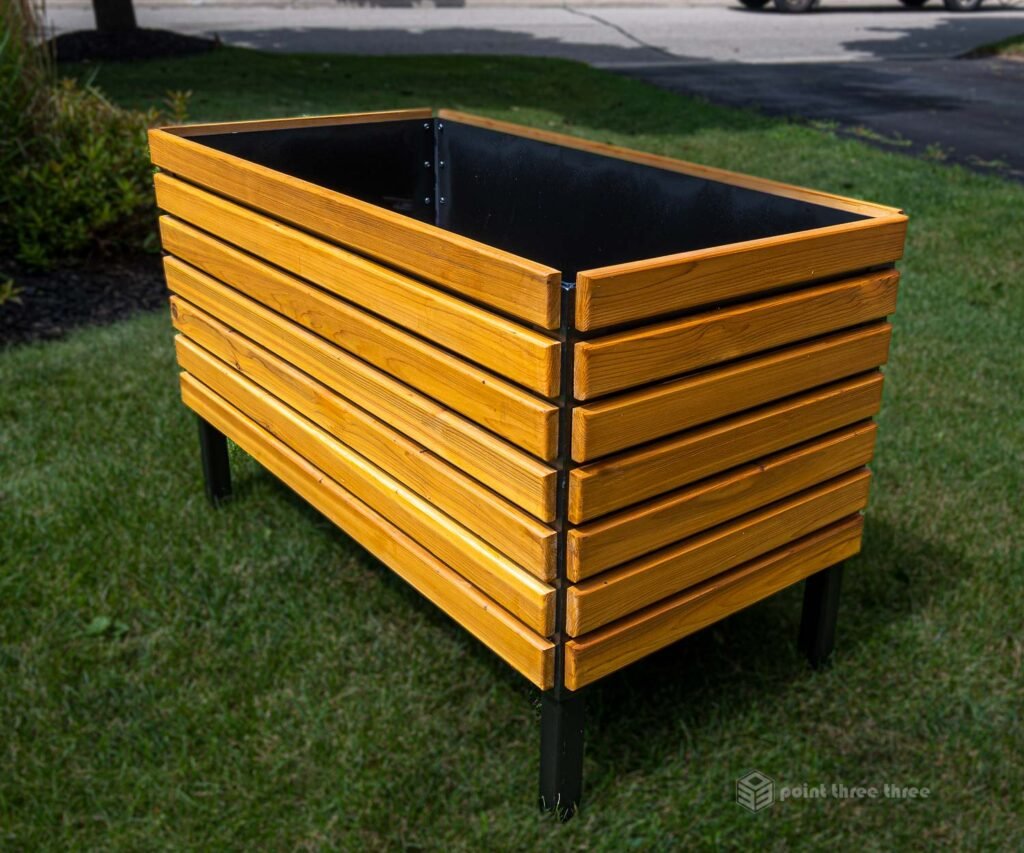
In this guide I will share how I built a couple premium DIY planter boxes. I drew inspiration from several Mid Century Modern (MCM) designs that ranged from $1K to >$2K. I also constrained myself with some guiding principles and fabrication decisions, which resulted in a design that was built over two weekends.
Guiding principles
- Premium Appearance – There are a lot of examples of “easy” builds that leverage simple wood construction and joinery. We, meaning my better half and niece, wanted a premium build that rivaled commercial examples which costed $1K.
- Durable – The box would be exposed to a harsh Canadian environment year round. It needed to be built to last. I actually built these two years ago from the time of this writing. They have held up through two harsh Canadian winters and summers.
- Reasonable Cost – These boxes were for my niece who is on a budget. I was building two of them and wanted to keep the cost under $300 (CAD) per box.
Design Decisions
- The frame would be made from Steel. Steel provided a premium appearance that I was looking for and of course strong. You can of course build a 2×4 box that is plenty strong and cheaper, but it would look much “bulkier”.
- Size – related to the above, since these were going to be relatively large boxes that would hold a fair bit of weight, steel was a good choice.
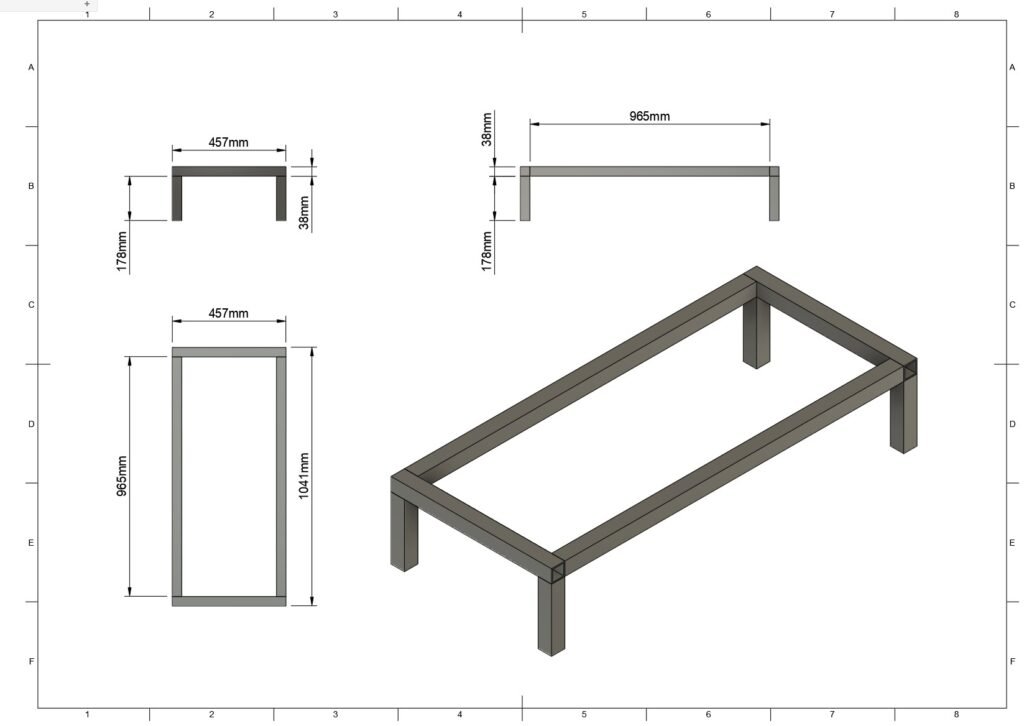
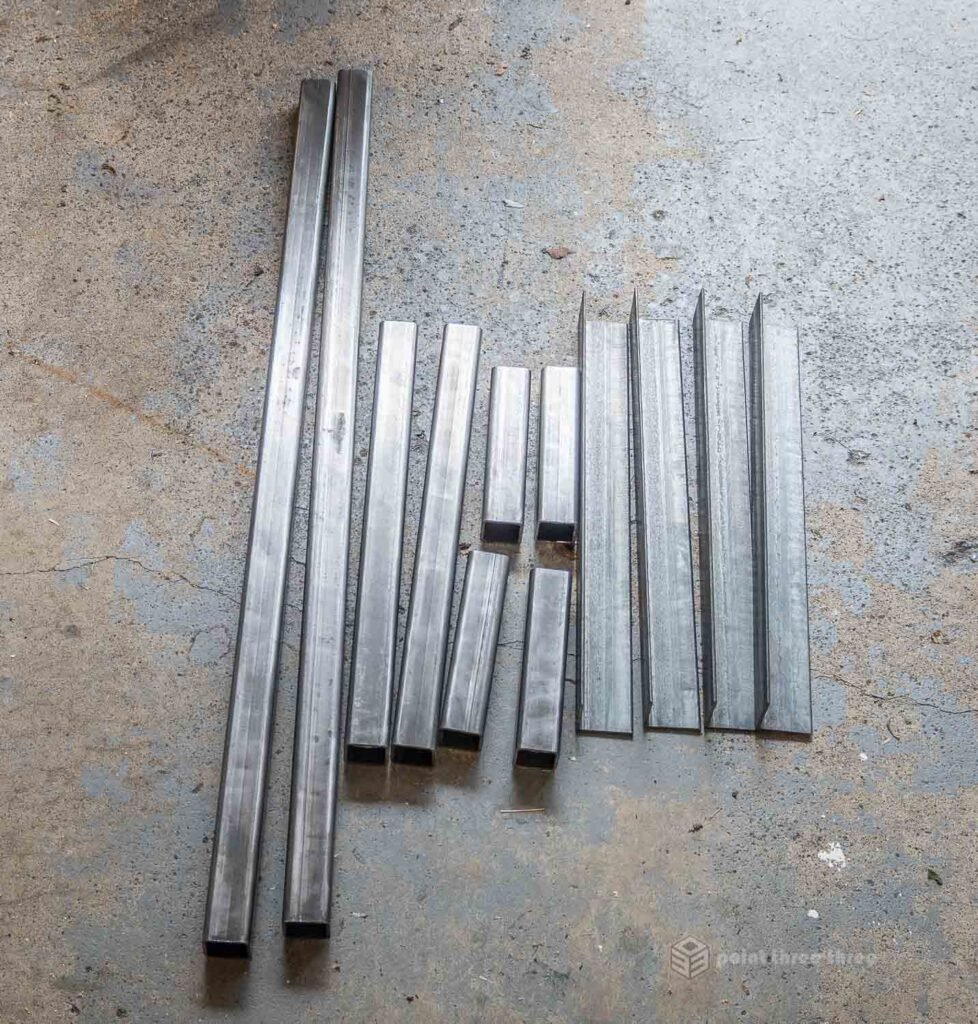
- The Base Frame is to be welded with Square Steel tube. Top box part of frame which would form the box supports, would be fabricated from steel angle iron and welded to base.
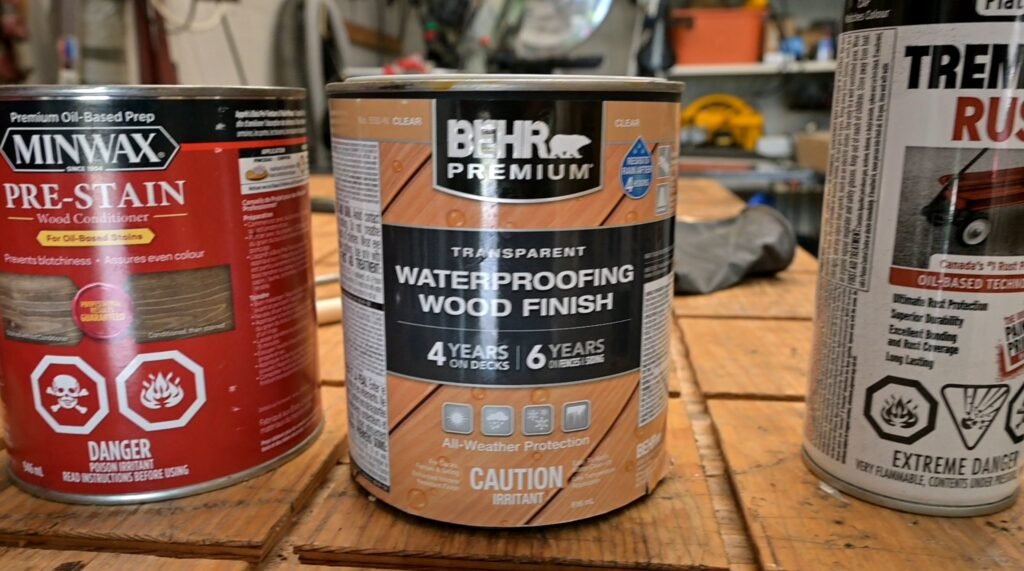
- Wood type = Cedar. Cedar is relatively inexpensive and weather resistant when properly treated. Teak would be a better choice but cost and availability had me opting for Cedar.
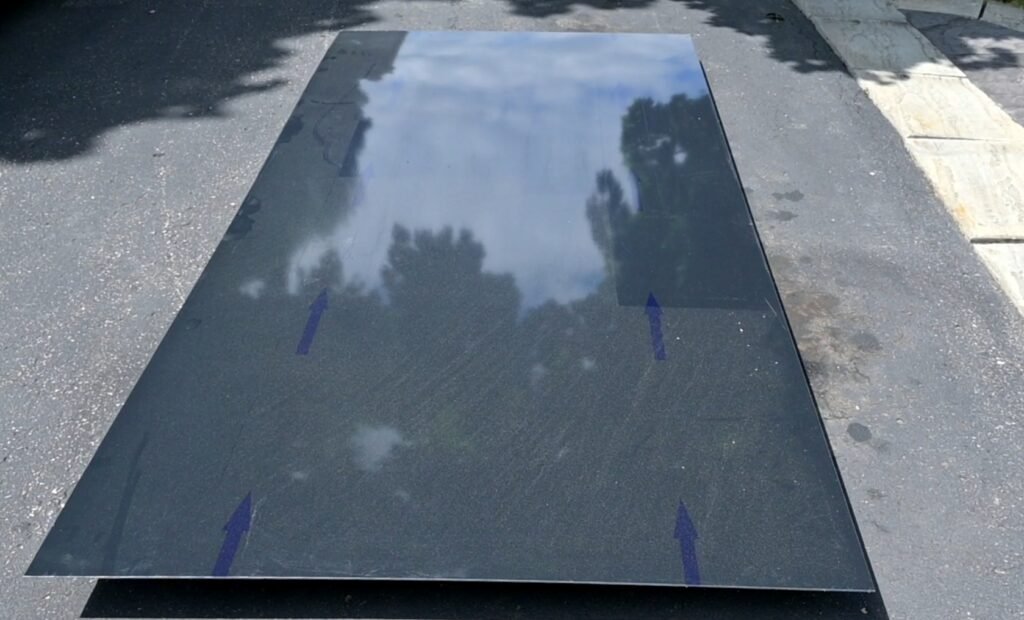
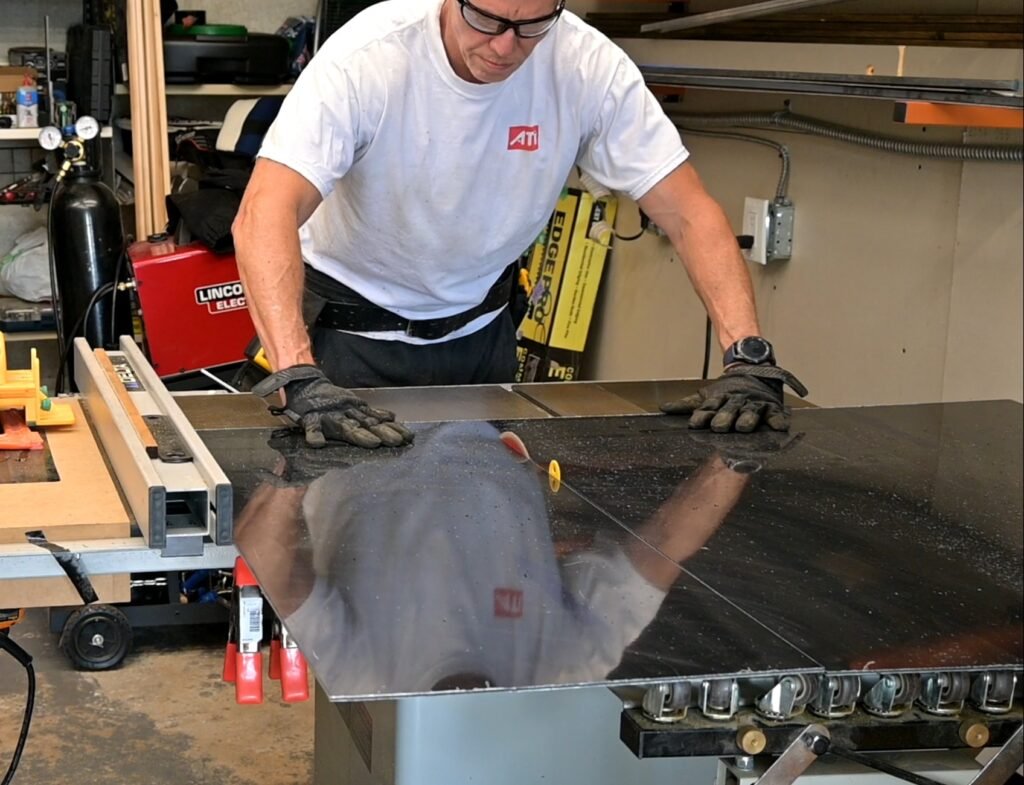
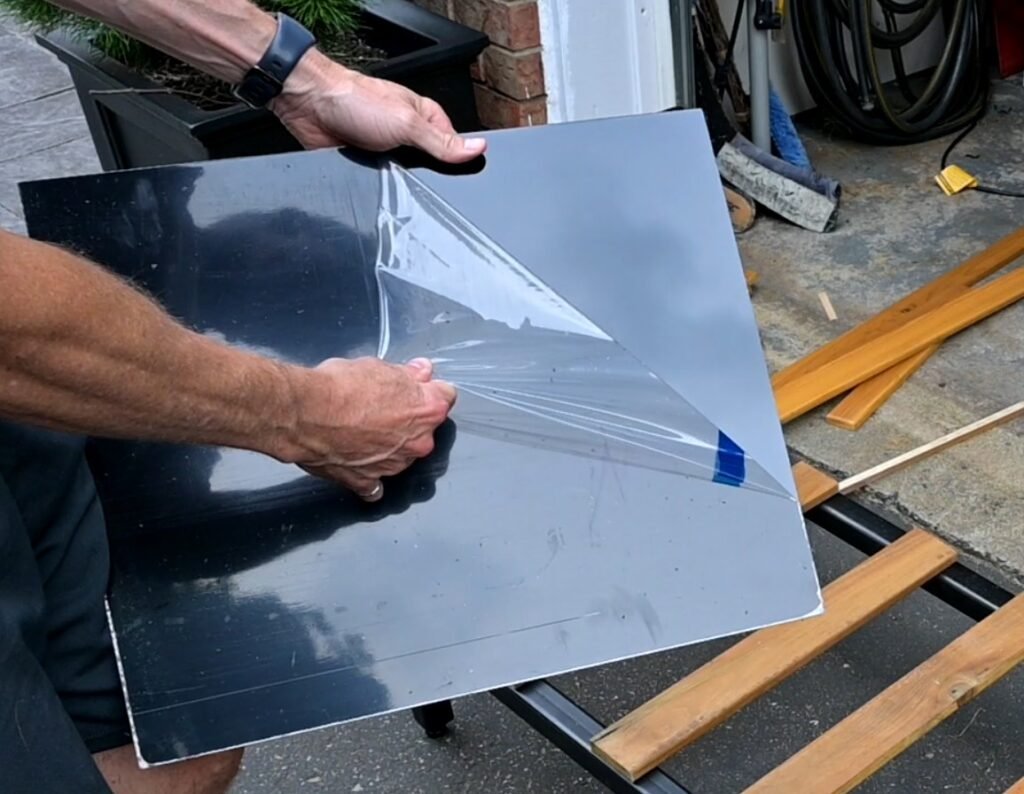
- Aluminum Composite Material (ACM) : The box frame would be fabricated with ACM. Dibond is a common brand name (think Kleenex). This was probably the most significant materials decision of the design. I thought about several options and ACM aligned with the guiding principles for Appearance, Durability and cost…
- ACM is a rigid, lightweight aluminum composite material (ACM) consisting of two pre-painted aluminum sheets bonded to a polyethylene core. It is commonly used in signs and I have personally used as the backer for Acrylic mounting pictures.
- Key Features and Benefits:
- i) Durability
- ii) Rigidity
- iii) Lightweight
- iv) black finish option (you can get various colours but I wanted black)
- Clean Joinery : I did not want visible screws or bolts. That meant securing the cedar wood slats with screws from the inside through the steel frame and ACM.
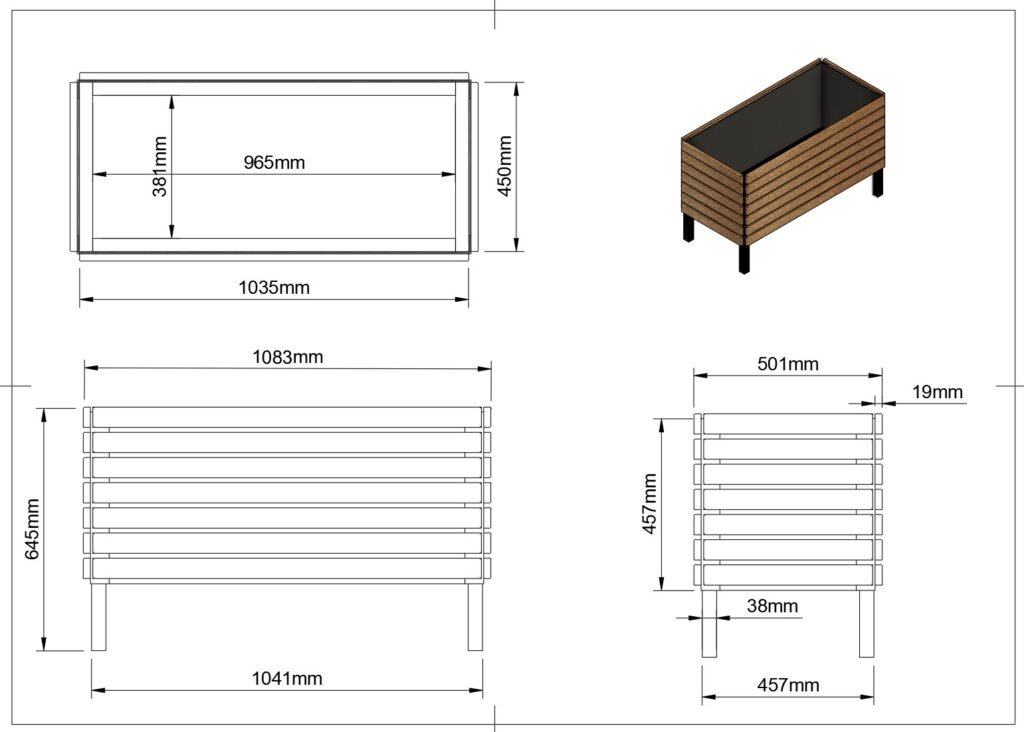
CAD Design – Fusion 360
I knew the design I was thinking of that it would be a good idea to design this in CAD. I have used Fusion 360’s free version on several other projects, but I am no expert. I have a learning curve every time I tackle a new project. That being said, it saves hassle and time in the end! For example, I knew with assembly of the steel and cedar slats, I needed to know where to pre-drill holes in the steel to enable screws to attach the cedar. CAD is tremendously helpful to ensure accuracy that sketching on a paper could not guarantee.

Project Supplies and Parts
Planter Box Costs
The below costs are material for TWO planter boxes. They are all in CAD and from 2024 so prices in your area may vary and depending on the supplier you go to.
For the Steel I went to a local supplier as I did for the Aluminum Composite Material (ACM) which is commonly referred to as Dibond. Other suppliers were just sourced at my local Home Depot.
| 11/2″ X 11/2″ x .125 x 24′ Square Tube | $88.87 |
| 2″ x 2″ x20′, Angle Iron | $44.00 |
| 11/2″ x 20′, flat bar | $21.85 |
| Dibond 4×8 @ 72.36/ea | $144.72 |
| Wood 1x6x6 x16pcs | $162.72 |
| Tremclad Paint | $27.96 |
| Wood Stain | $33.97 |
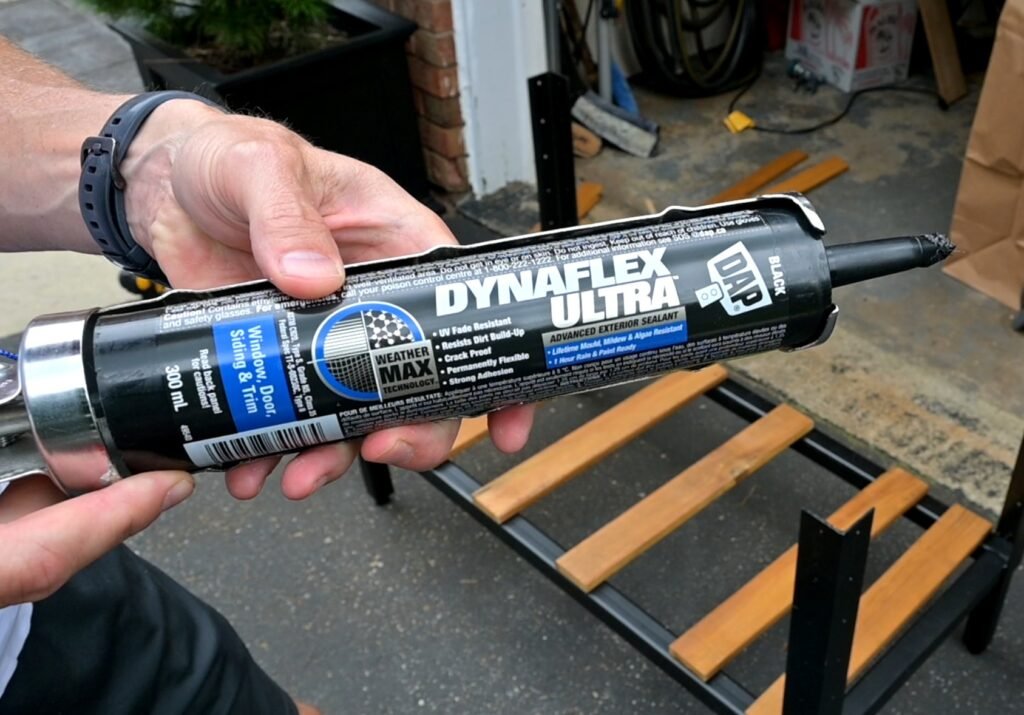
| Black Caulk | $11.77 |
| Sub Total | $535.86 |
| Tax | $69.66 |
| Total | $605.52 |
Steel Fabrication
Welding
I had been doing woodworking for years. I was always curious about learning to weld steel and finally picked up a Lincoln Mig Welder .
While I am a novice at welding, with a little bit of practice and learning some tricks, you can certainly tackle a steel fabrication project like this.
Steel Frame Cutting
The steel components were cut to length with an abrasive chop saw. The saw I have is the Dewalt 14″ Cut-off saw .
It makes an ugly cut that you have to clean up with the grinder, but it does the job.
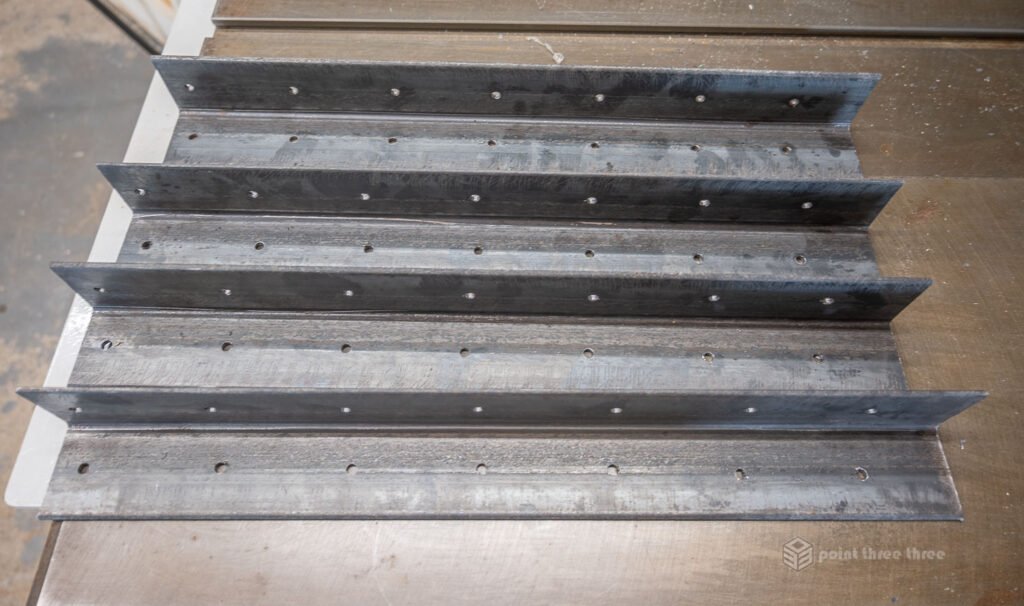
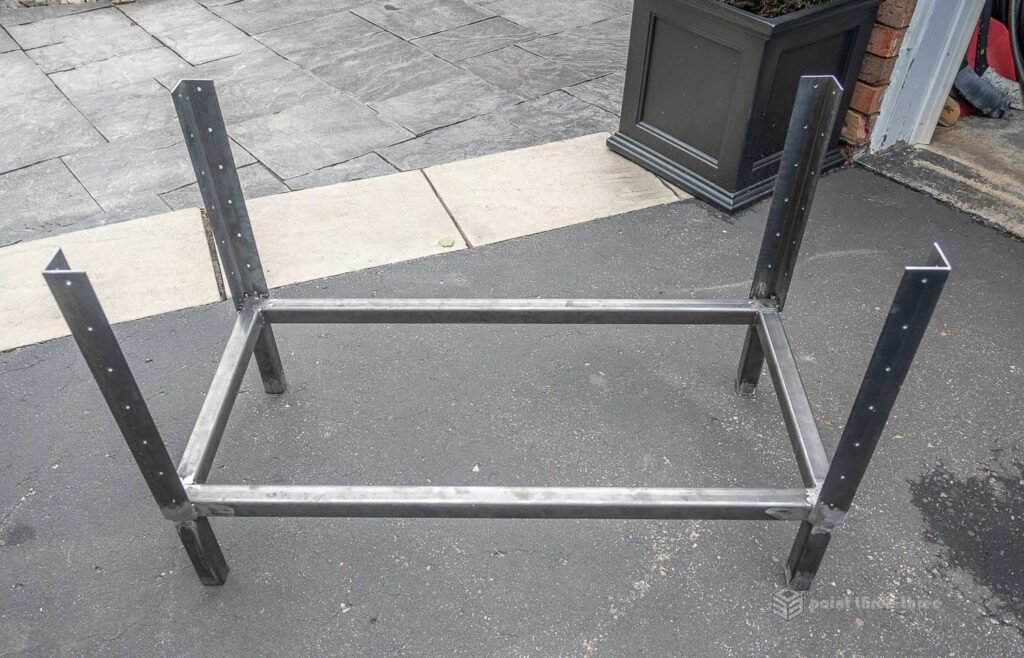
Box Corner Framing = Angle Iron
The supports for the main box are 2″ Angle Iron that had a gauge of 1/8″. Each of the 4 corners are to be welded individually.
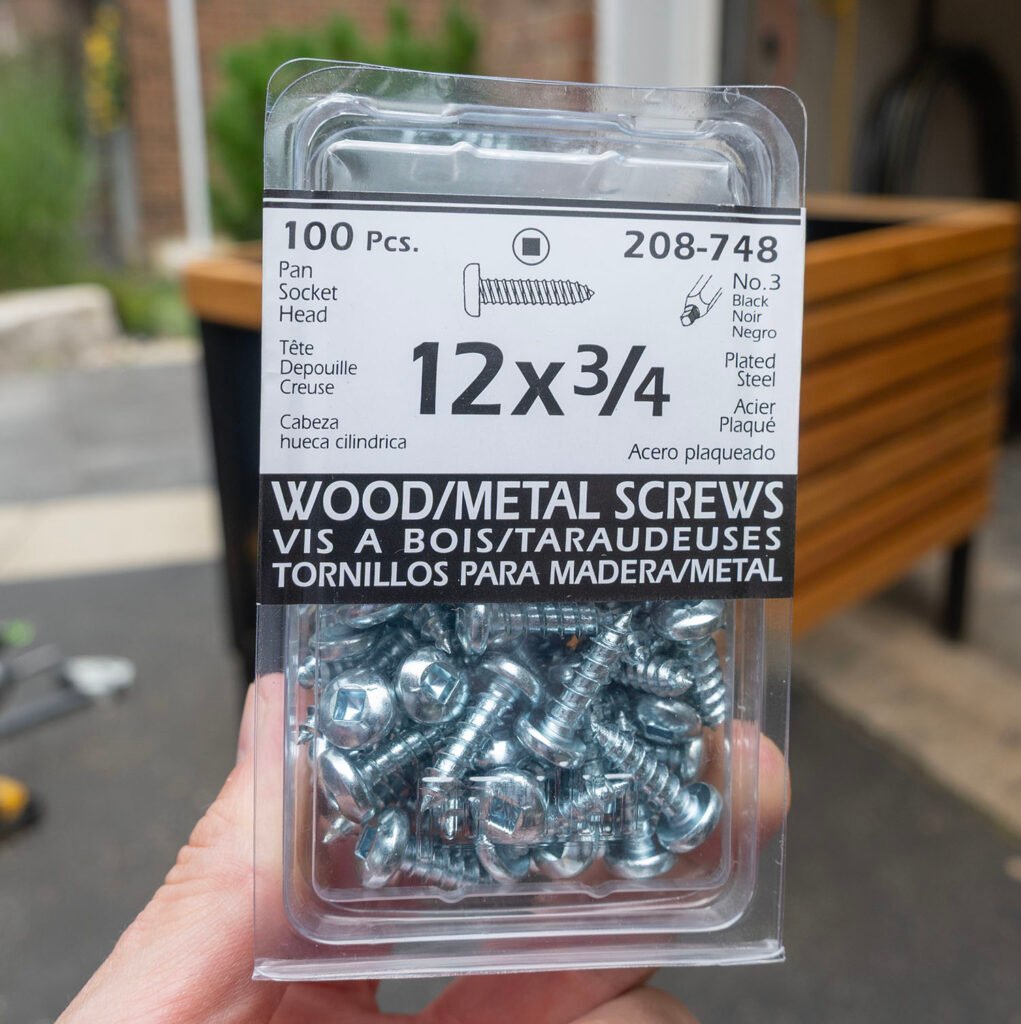
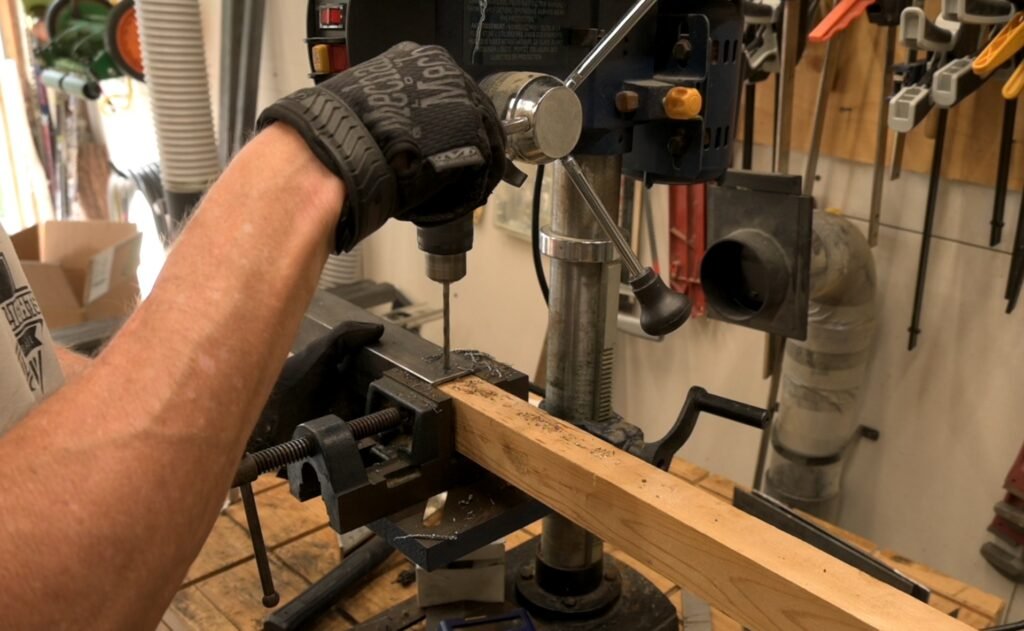
Holes in the angle iron were drilled on the drill press using a 1/4″ drill. These holes will accept the #12 screws that will pass through this, the ACM and into the cedar to hold those slats in place. I use a center punch to mark the hole center and provide the drill some guidance. Tip : Use a drill lubricant to help your bit cut through the steel and have your drill press on the a low RPM so you do not overheat the bit.
Fabricating the Base and Box Supports
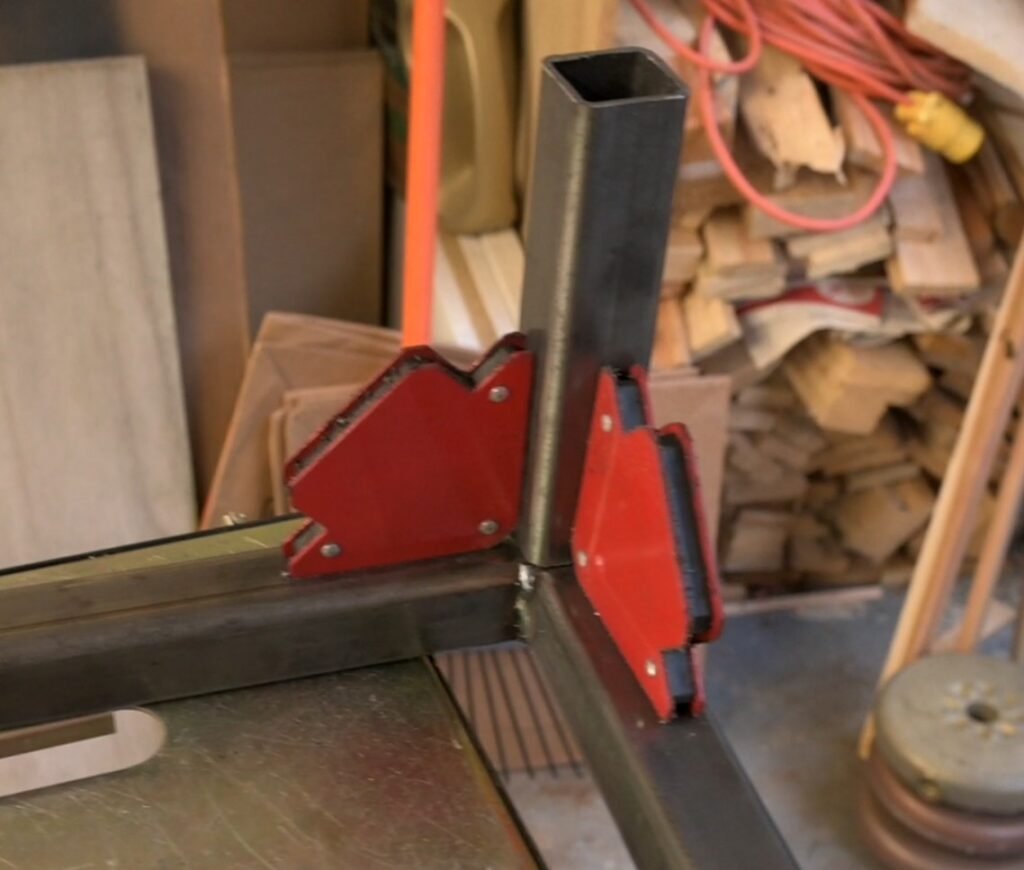
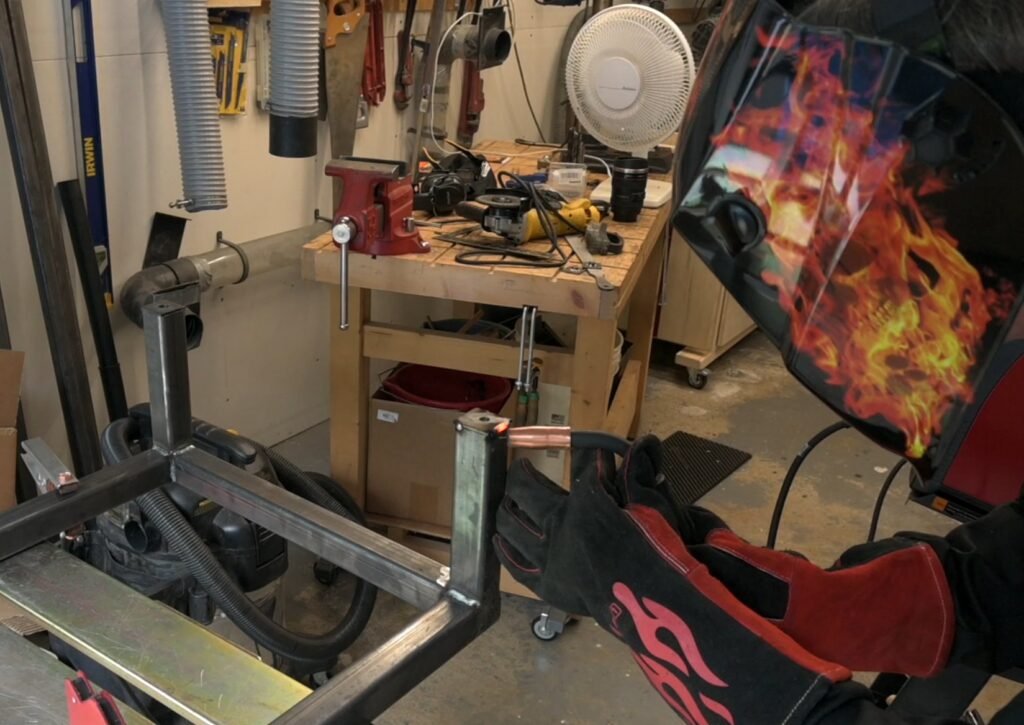
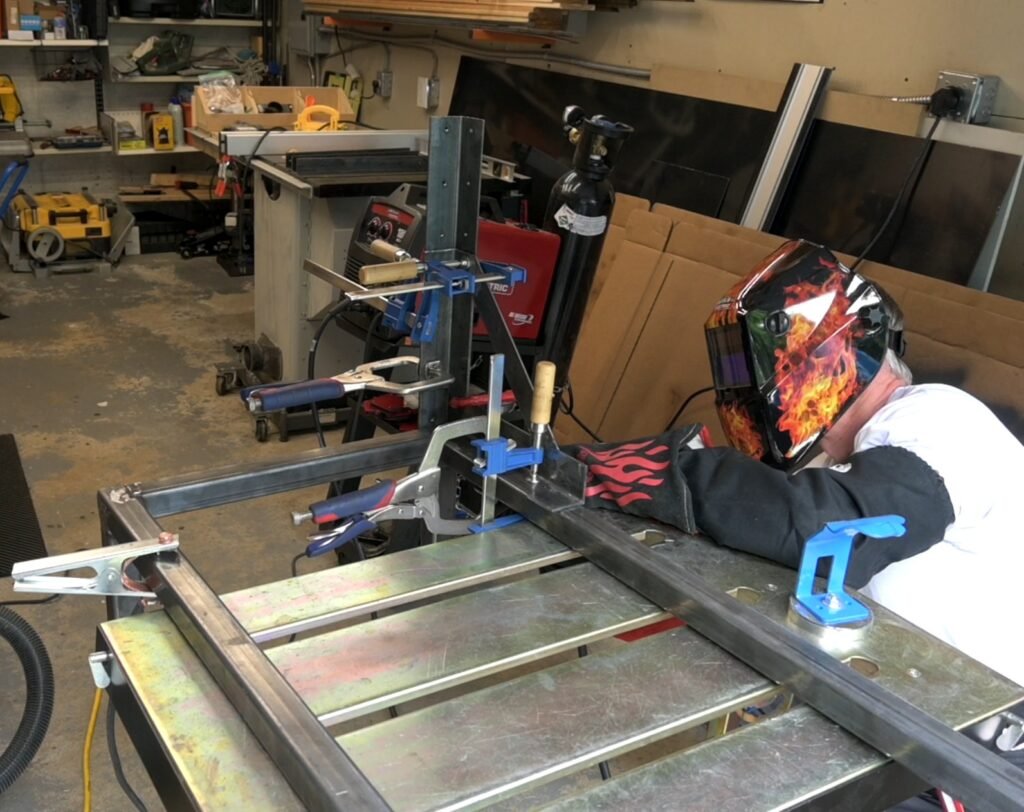
I have completed several welding projects but I am still relatively a novice at this craft. I have learned that it is very important to weld your corners in a specific sequence and to clamp them into place to minimize the joint distortion. I do not have any professional fixturing table so while my results certainly had room for improvement you can do this type of work without breaking the bank when you start out.
See the number of clamps and right-angle jig I used to try and hold the square tubing in place.


For the legs, which were relatively short, I found the 90deg welding magnets to be a great “third hand” to hold a piece square and in place when initially tacking the component.
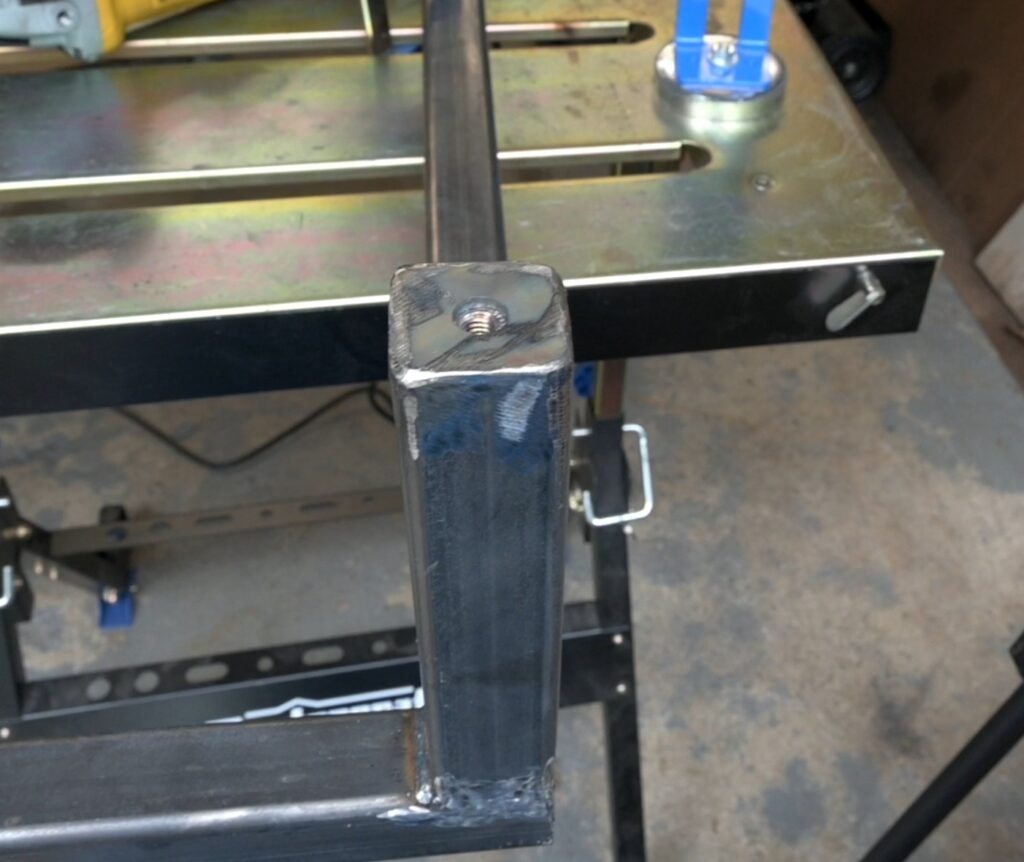
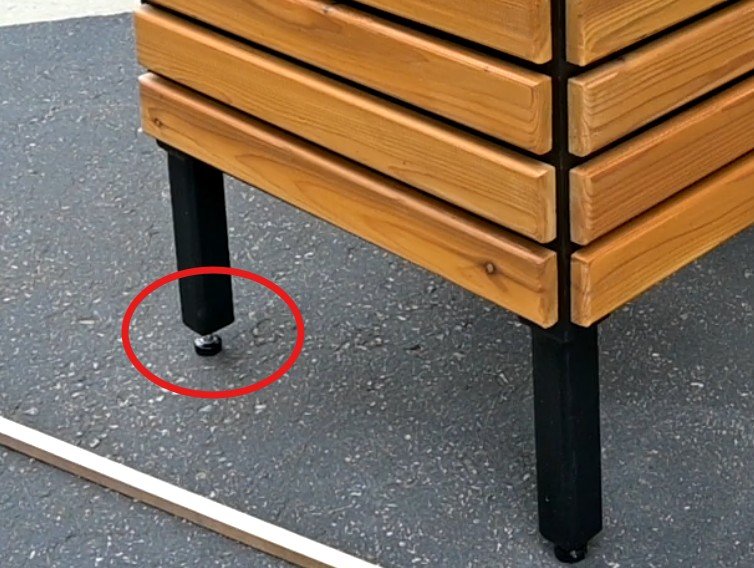
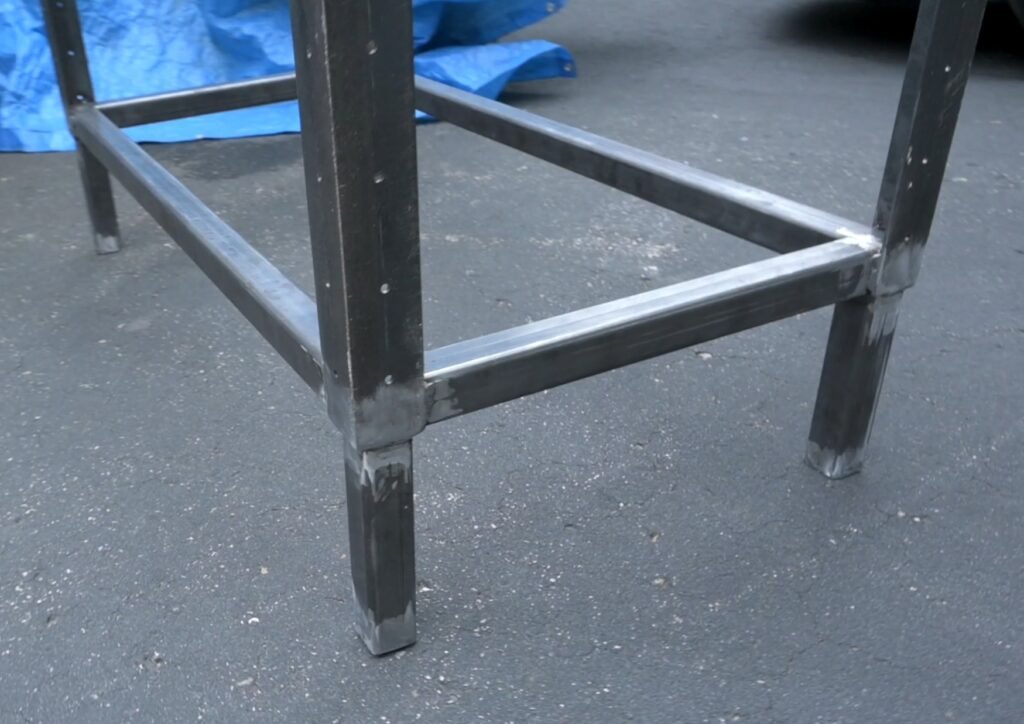
One key design element was to make each legs height adjustable. The planters were going to sit on a stone patio that was far from perfectly level so you need this to prevent rocking, even if your legs are all perfectly to length.
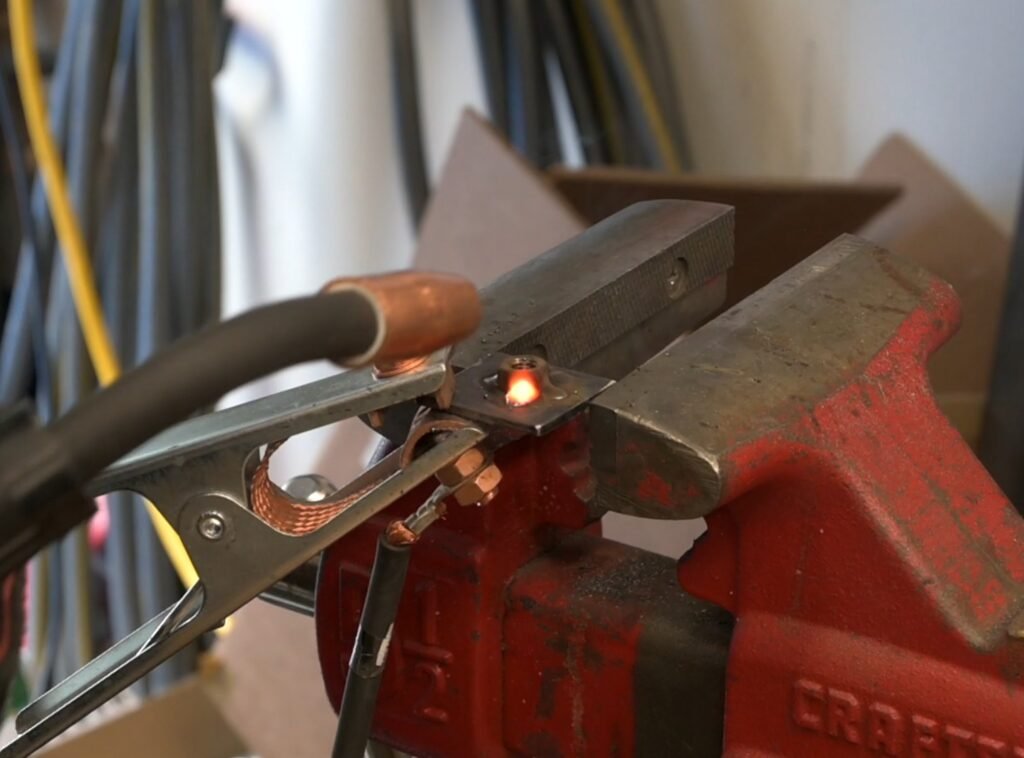
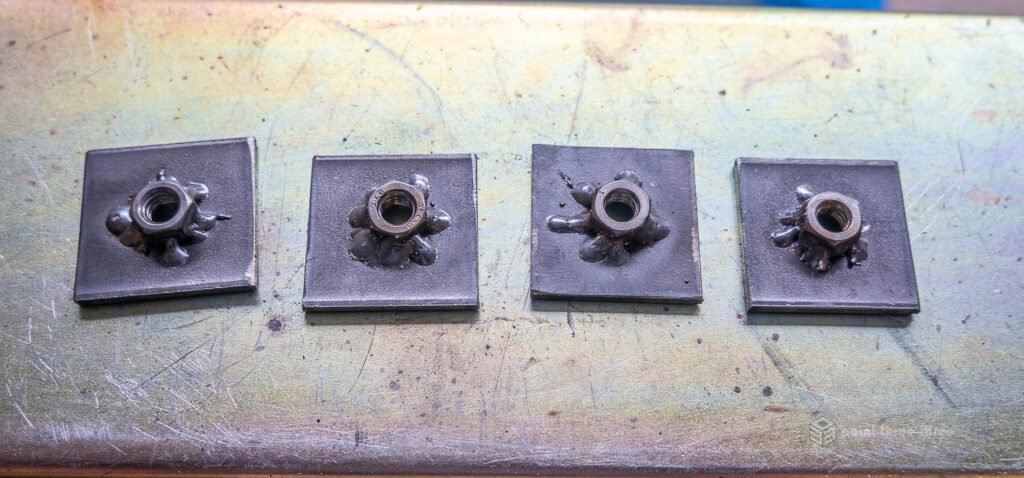
My approach was to weld a Nut in place on square plate with a ‘pass-thru’ hold that would in turn be welded to the based of the leg. This was a bit trickier than I thought with the Nut. I had a couple instances where I welded the nut too much which in turn deformed it ever so slightly which effected the ability to thread in the bolt/foot. My solution was a series of tack welds letting the nut cool off in between tacks. It looks ugly but these are covered up and on the inside of the leg so as long as it was functionally strong, I didn’t really care.
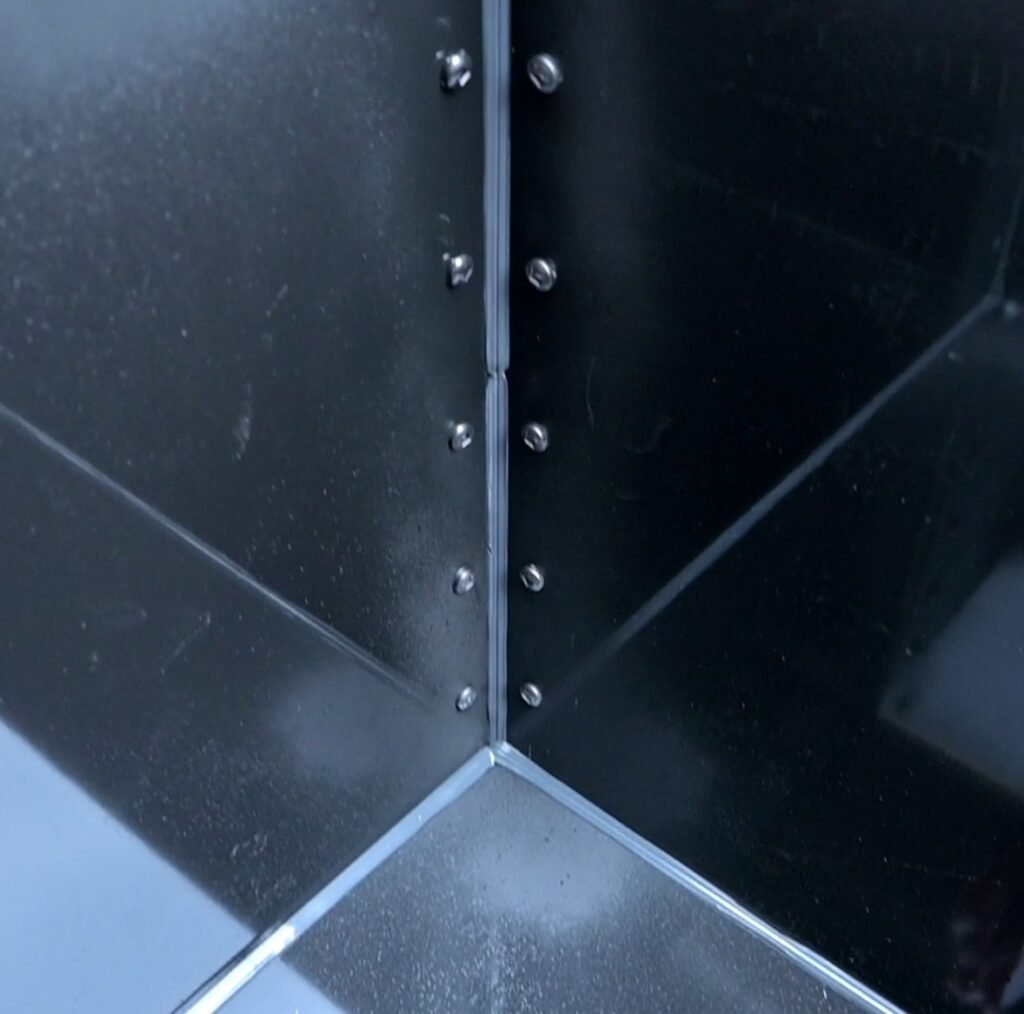
The angle iron components that would be the supports for the upper box were the most crucial to get square. If they were off it meant the ACM sheets that would be cut square would have gaps in the corners, and the cedar strips would appear mis-aligned as well.
Take your time here, clamping and carefully tacking the joints to square was critical before doing a full welded joint. I did a fully welded joint on the outside and a series of tacks on the inside which would be 100% hidden.
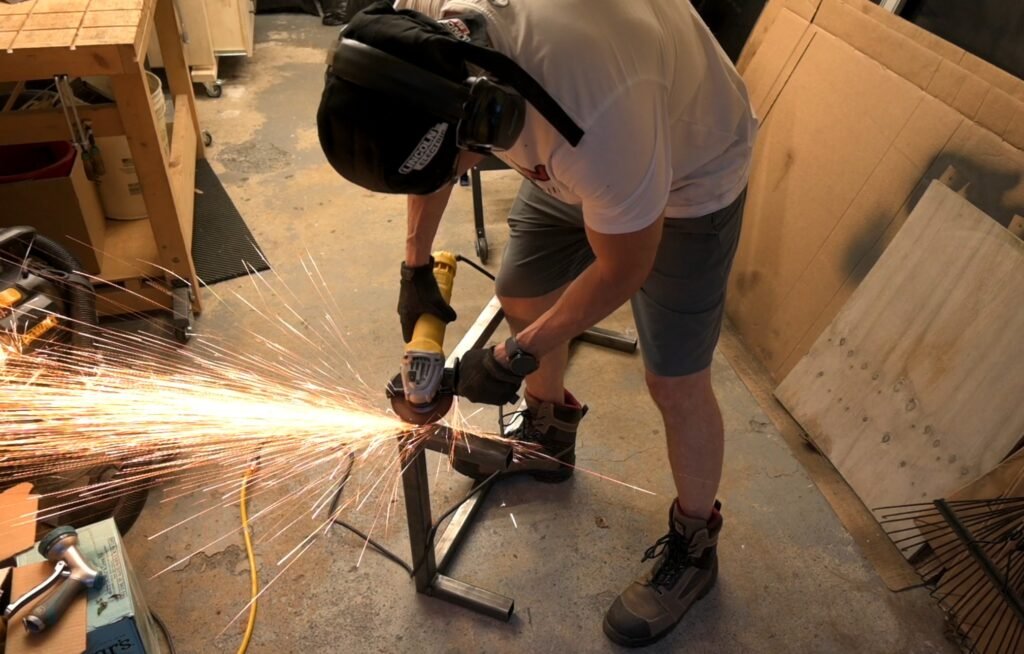
All the welded joints were then grinded in preparation for the painting stage.
Cedar Wood Slats fabrication
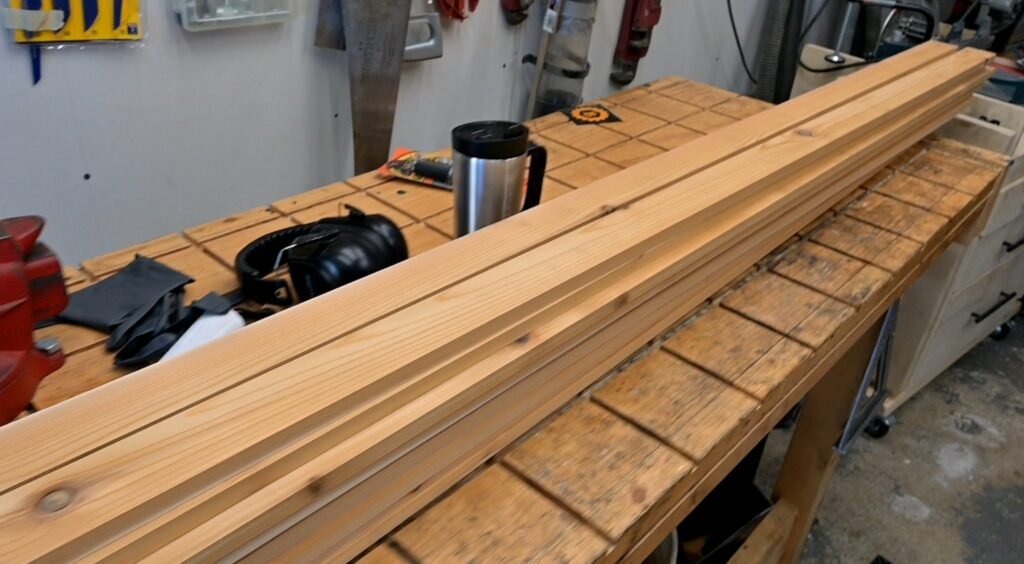
The cedar slats that are fixed to the outside of the box were fabricated from 1″x6″x6′ cedar boards.
Teak would be the optimal wood choice as these boxes will exposed to the environment 365 days of the year. However, I wanted to keep costs to a minimum and I think cedar was a good trade-off.
Make your life easier and spend time picking the best of the best boards at the big box stores! A lot of the lumber can be grossly warped.
First step is ripping them to width on the table saw.
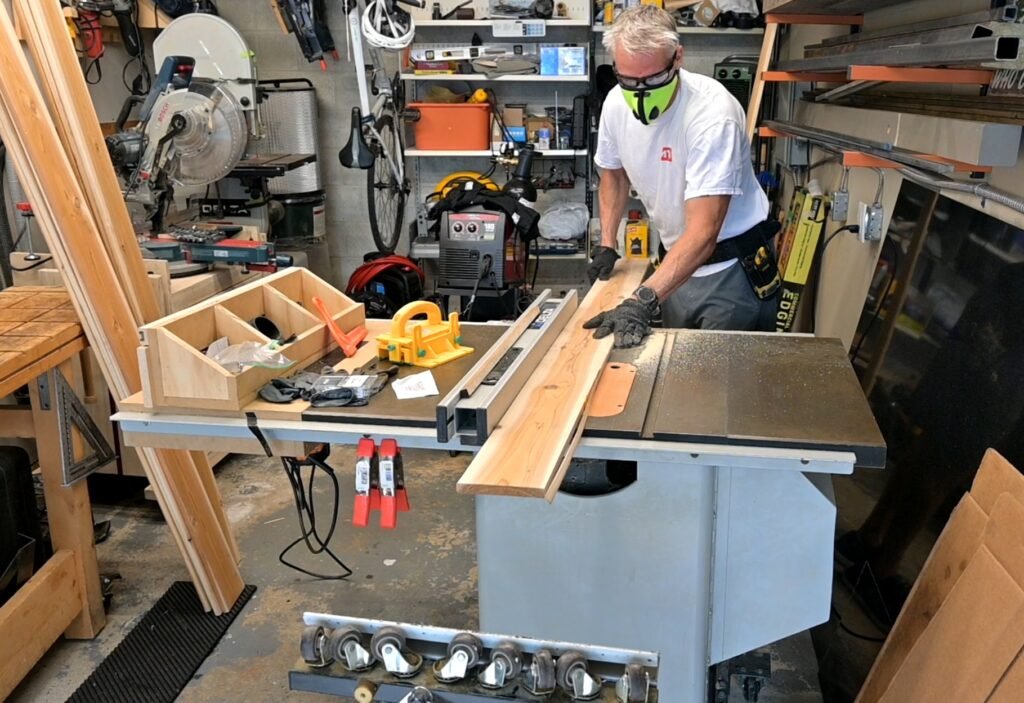
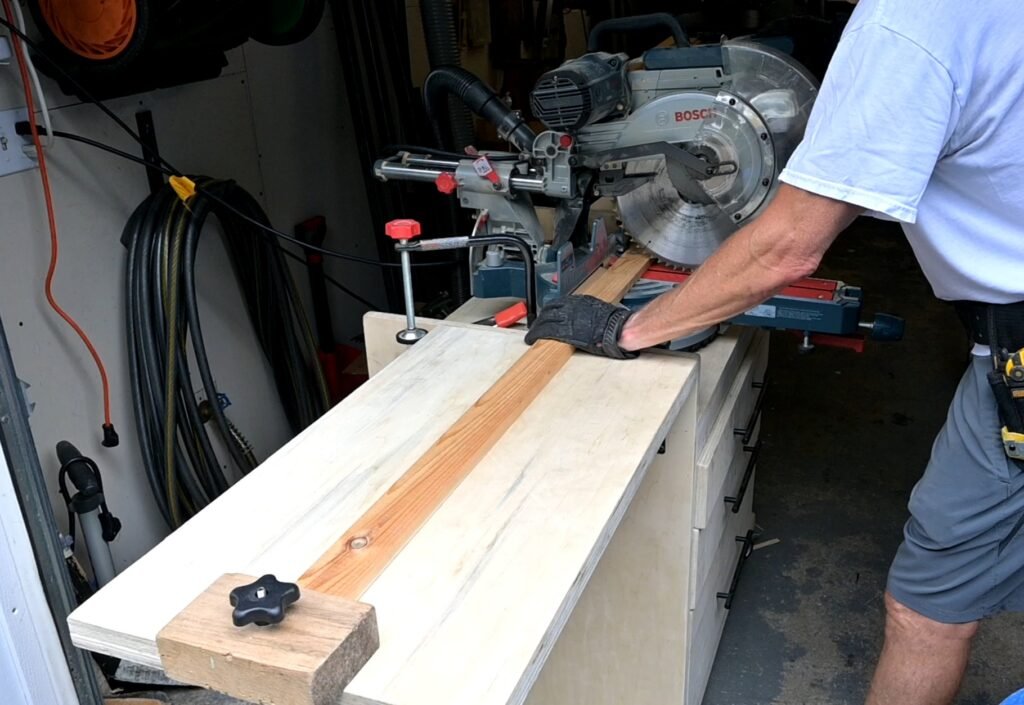
Cut the parts to length on the mitre saw. TIP : Using a stop block makes this process fast and very repeatable cuts.
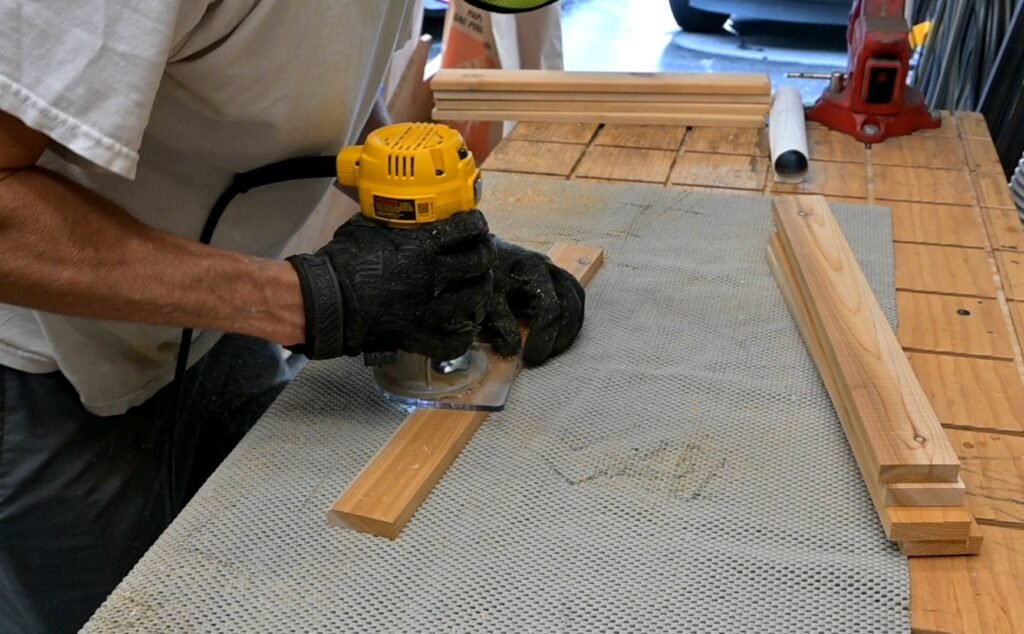
I did not want any sharp corners on the cedar slats. So I used a round over bit in my palm router to do a quick pass over ever slat. It was a bit tedious but a little thing like this goes a long way in appearance and avoiding an injury bumping into the planter down the road.
Painting and Staining
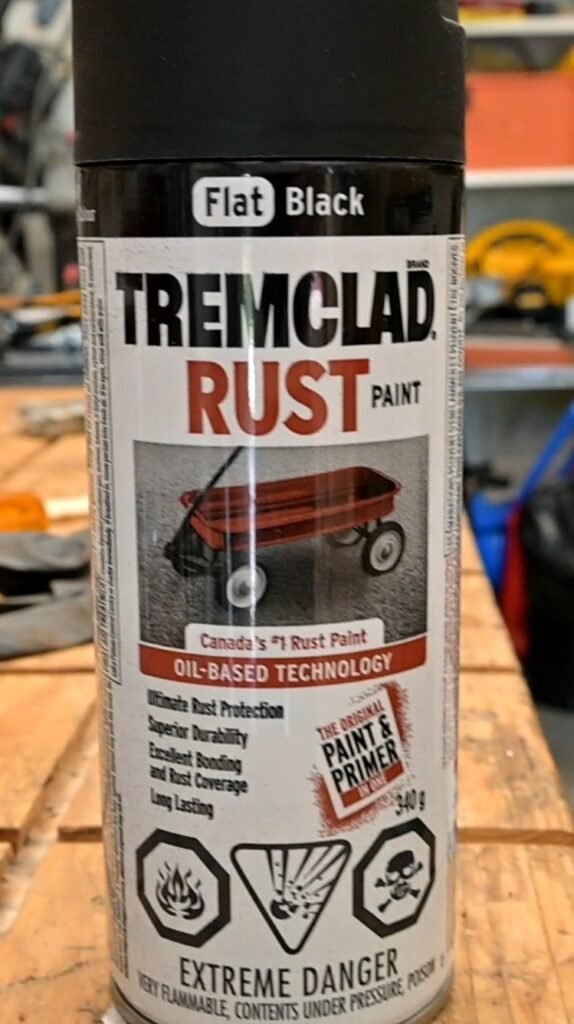
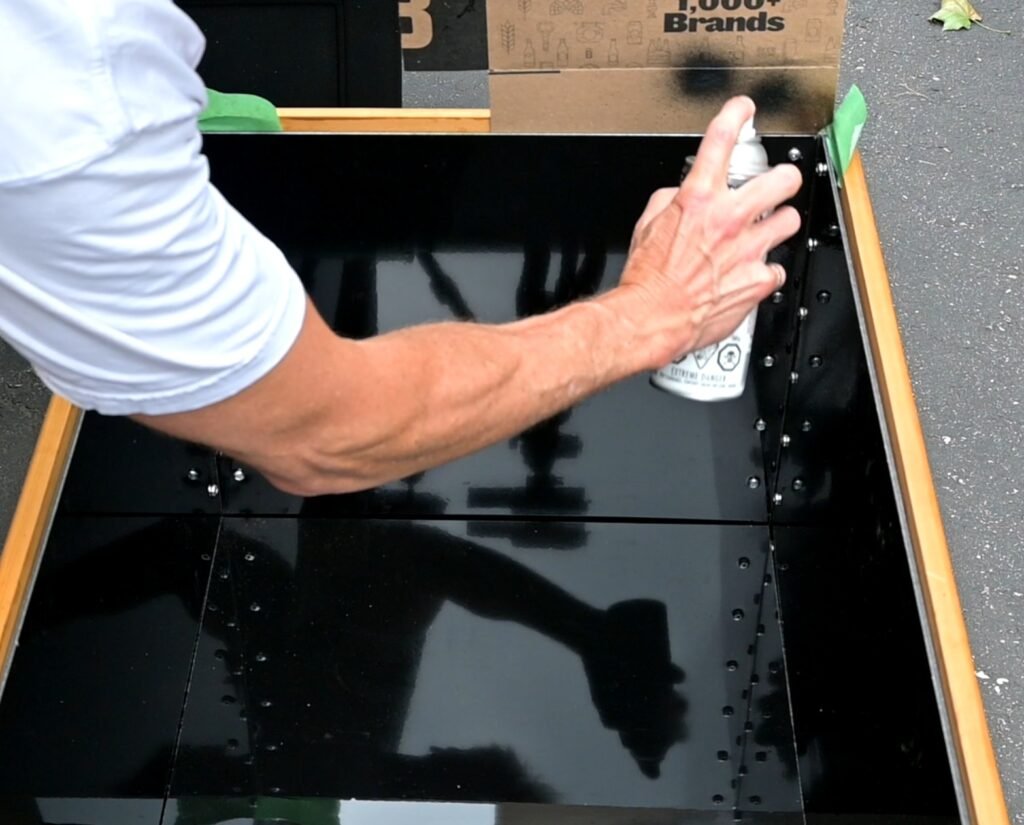
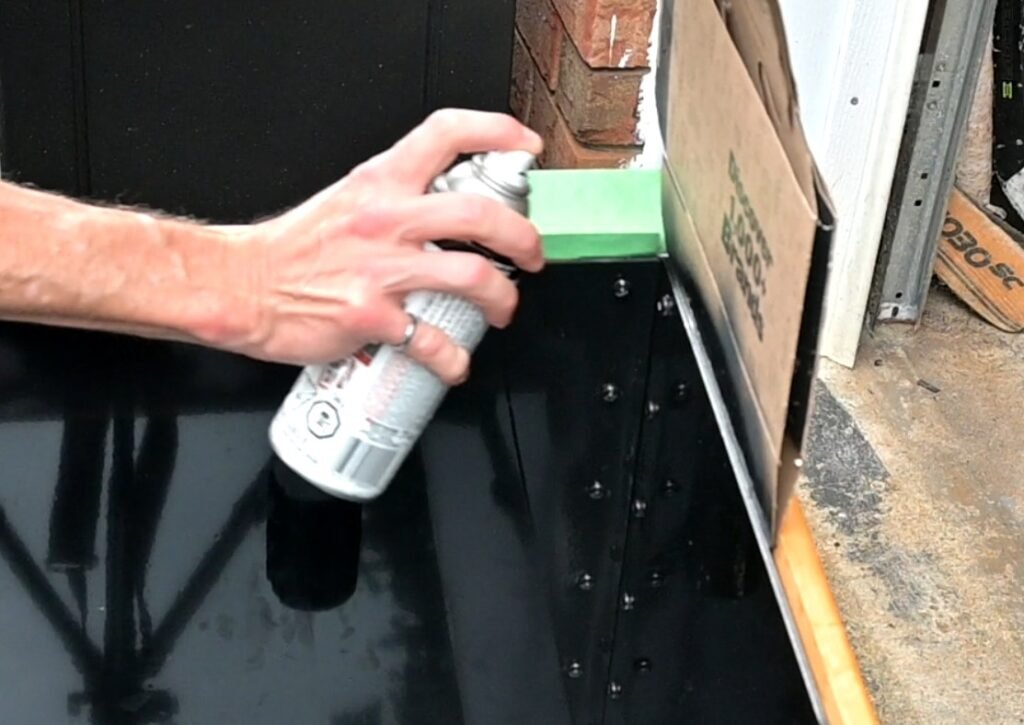
The steel needed to be rust proofed as it would be exposed to the environment and we were not going for the “rust look”. I opted for a matte black Tremclad spray paint. I had to buy two cans to finish both planters. I did a couple coats to ensure I had good coverage and protection.
This was all done before assembling the ACM and Cedar slats.
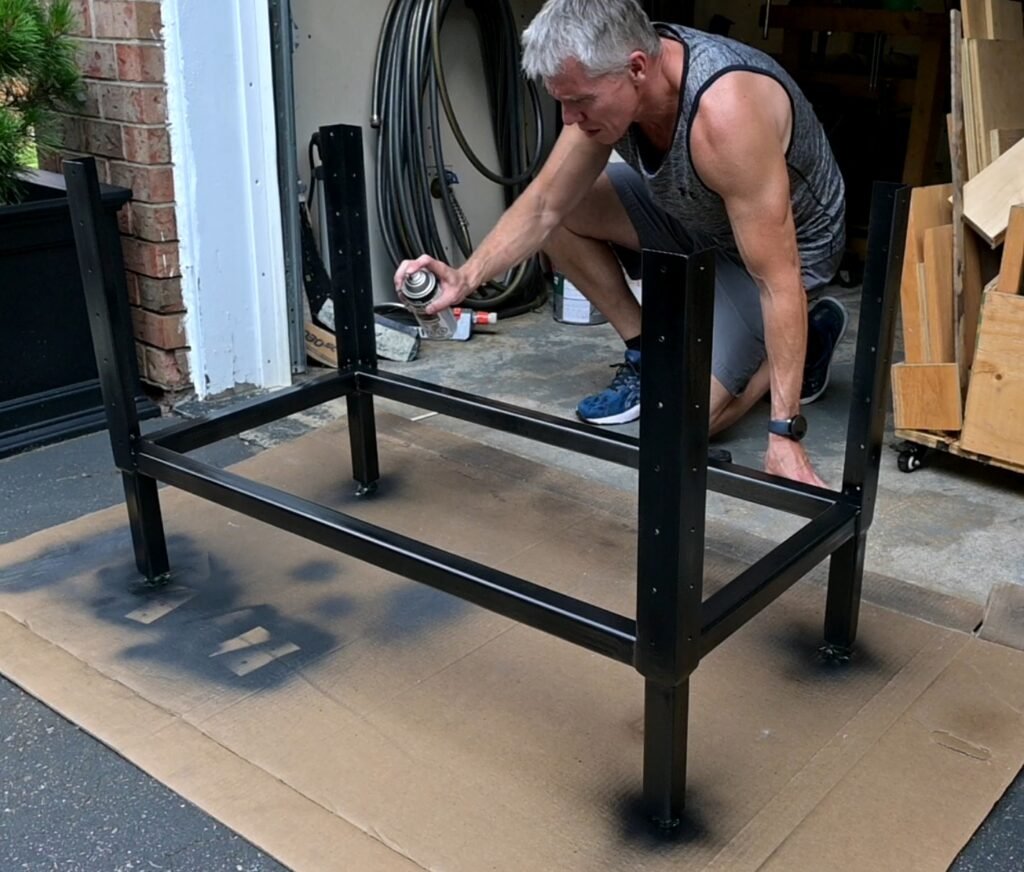
I also painted the screws on the inside of the box which you can see further down in this build. These would surely rust and have issues down the road otherwise. The top edge of the ACM was also painted as that was a cut edge and I did not want the contrasted look from the cut aluminum.
Base support and Aluminum Composite Material (ACM) box
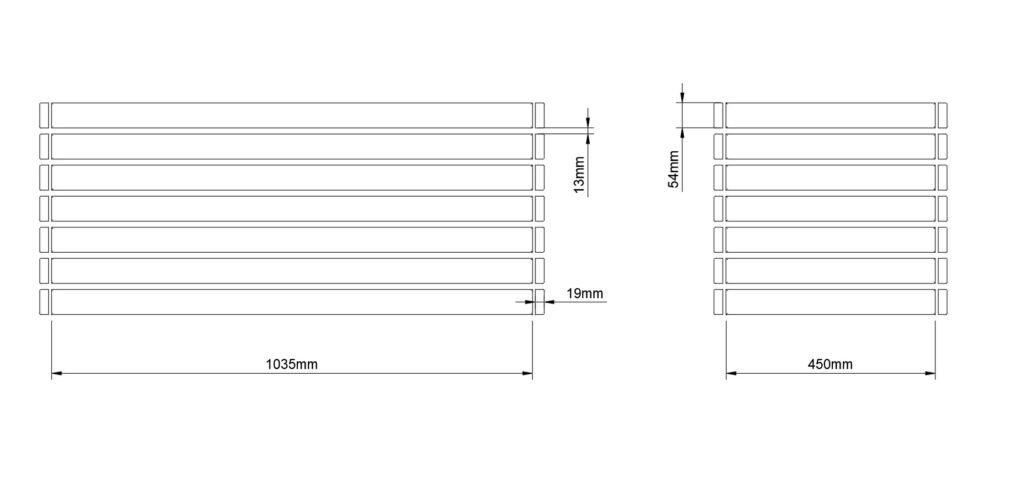
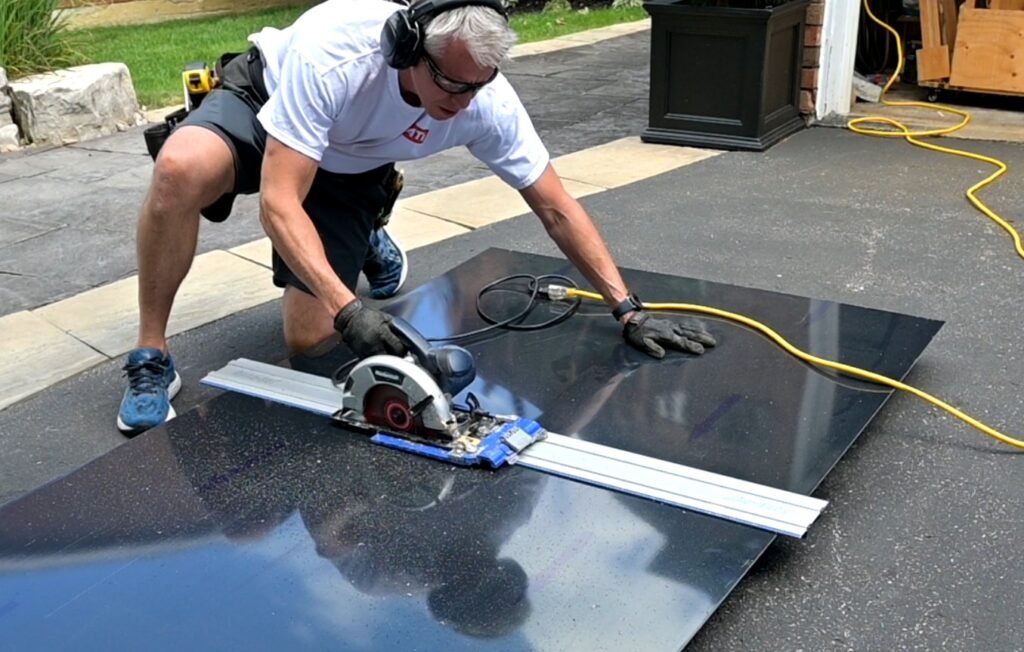
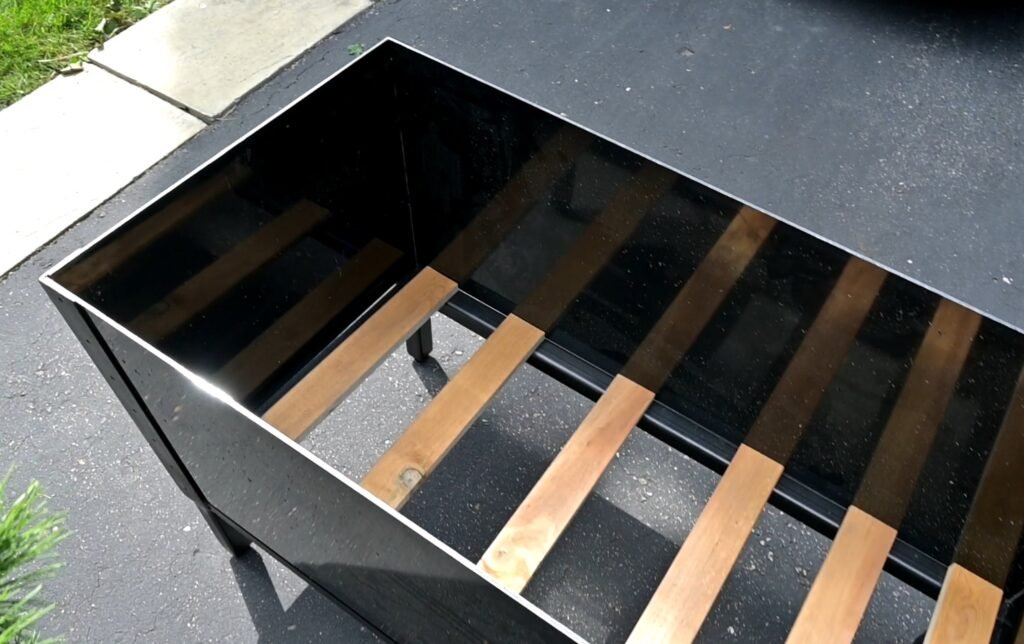
The box which will hold the soil & plants will be constructed from ACM as per the drawings.
An ACM sheet as well will be used for the base of the box. While ACM is extremely strong and durable, its thin and will need support to keep it from bending and/or buckling when the box is filled.
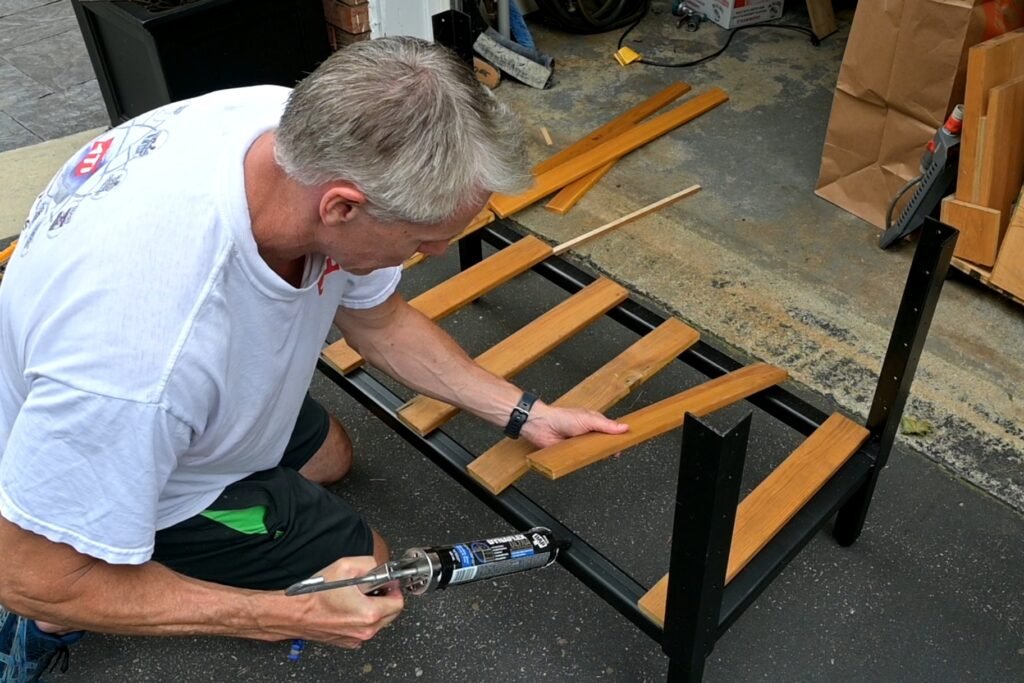
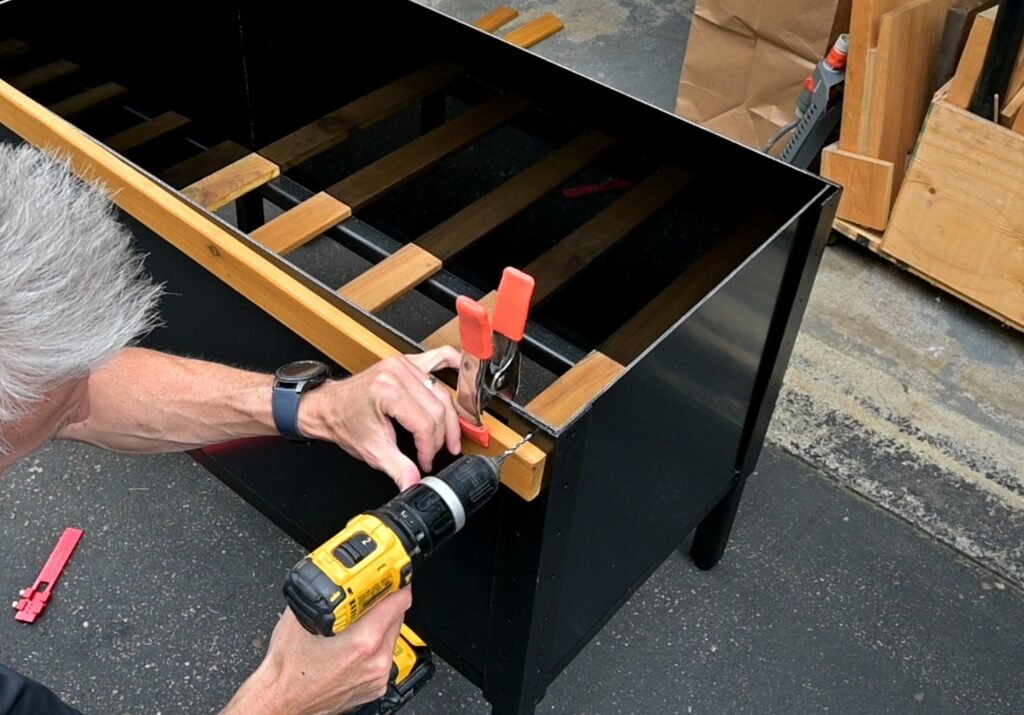
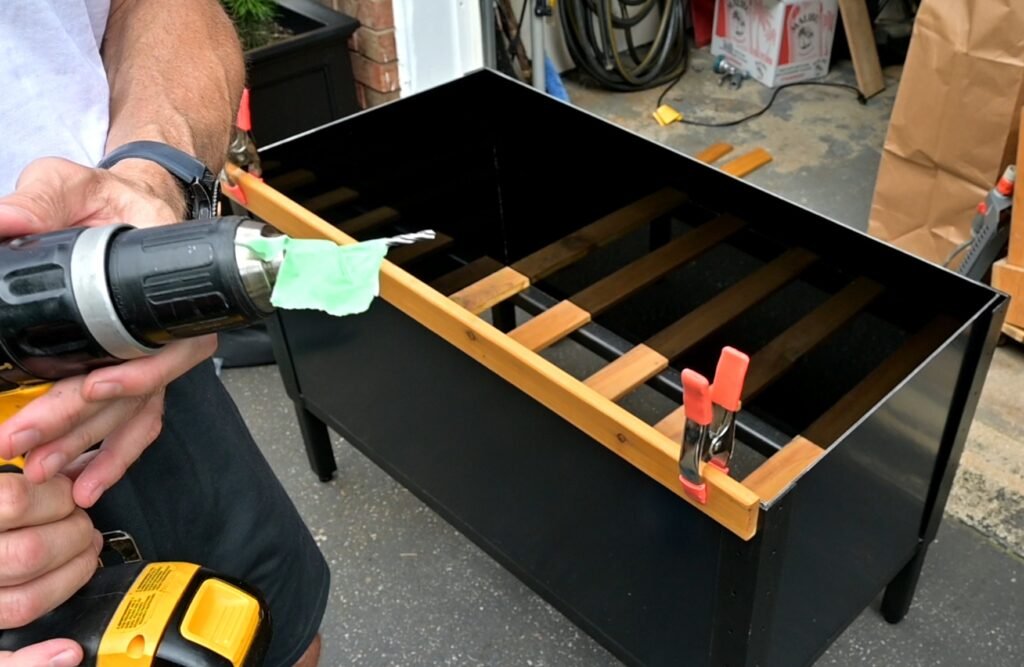
I used some of the left over cedar to cut strips that would go across and sit on top of the bottom steel bars as seen in the photo. These do not have to be precise, just fitted.
I used the sealant and adhesive to fix these to the steel. I did not think there was a need to screw them into place. There will be a sheet of ACM on top and gravity will be adding extra enforcement with contents are in the box.
The ACM sides just slide in and sit in place. They will be secured later when the Cedar slats are screwed to the angle iron.
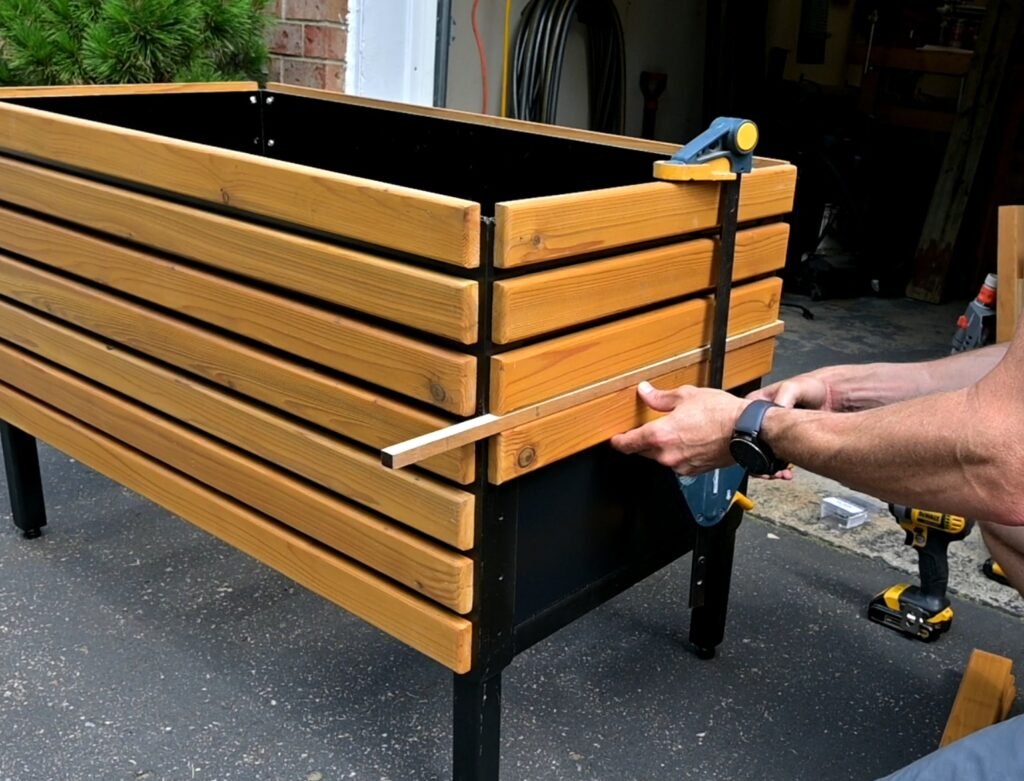
Cedar Slat Installation
I installed the cedar slats from the top down. Its really important to have the top row installed at the correct height and level as the next slats will be referenced from the top one.
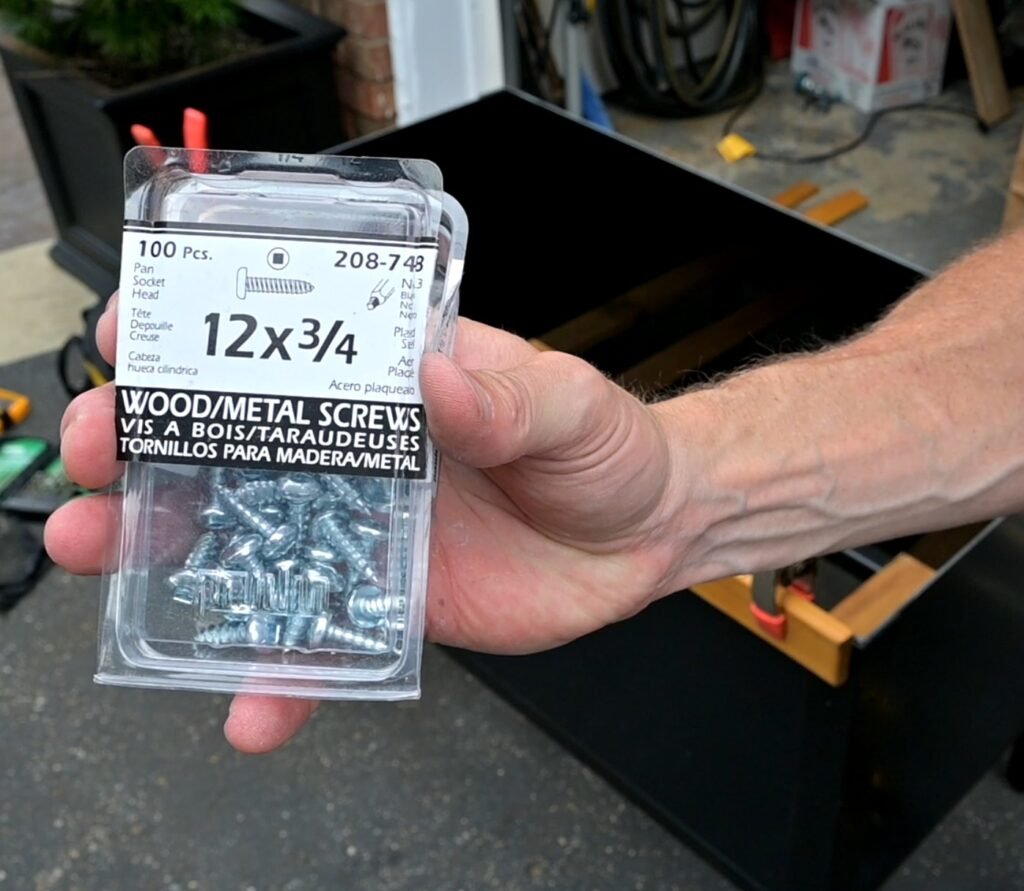
One of the main design constraints is we did not want to see screws in any of the joinery. Therefore, each slat will be screwed with a #12 screw from the inside.
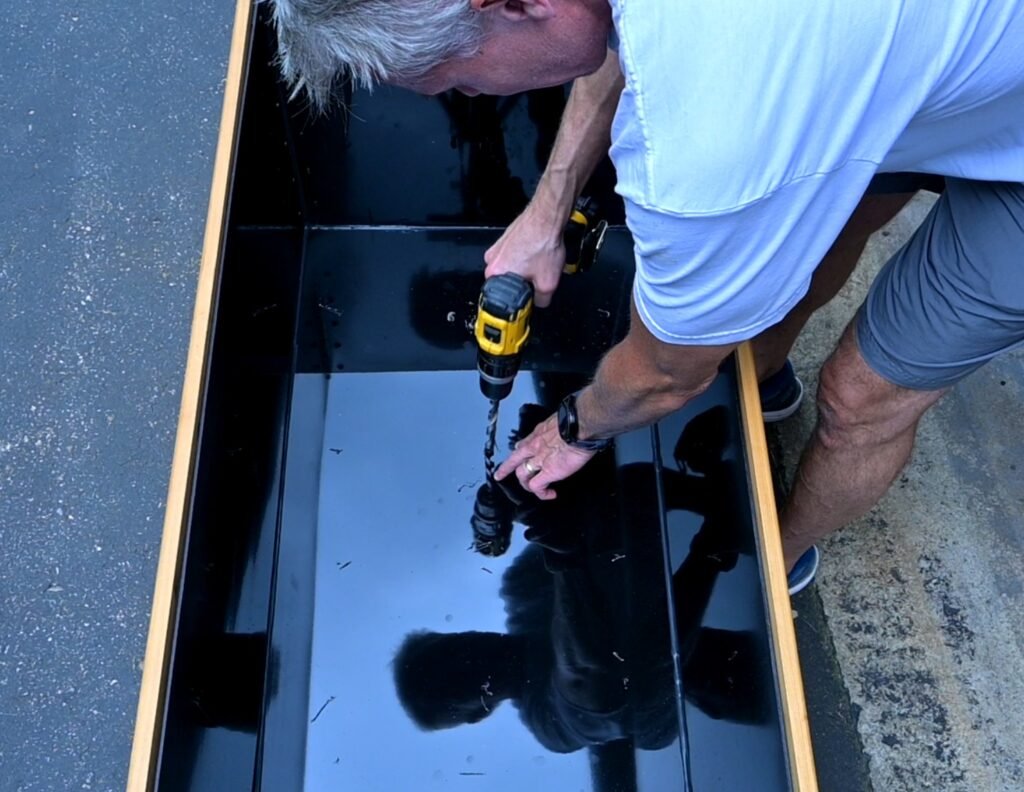
Prior to putting the slat in place, use the pre-drilled angle iron hole to drill through the ACM.
Screwing in a #12 screw to the end of the slat would likely cause splitting so you want to pre-drill the hole. Since we will be screwing from the inside, the hole in the ACM will act as your guide. TIP : You want to ensure you do not drill through the cedar, so I used a piece of tape on the drill as a depth guide. If you have drill depth guide, even better.
Rather than measuring the gap between every slat, I simply cut a wood spacer equal to the desired gap, which was 13mm. This speeds up the process and makes it more accurate and repeatable. Highly recommended!
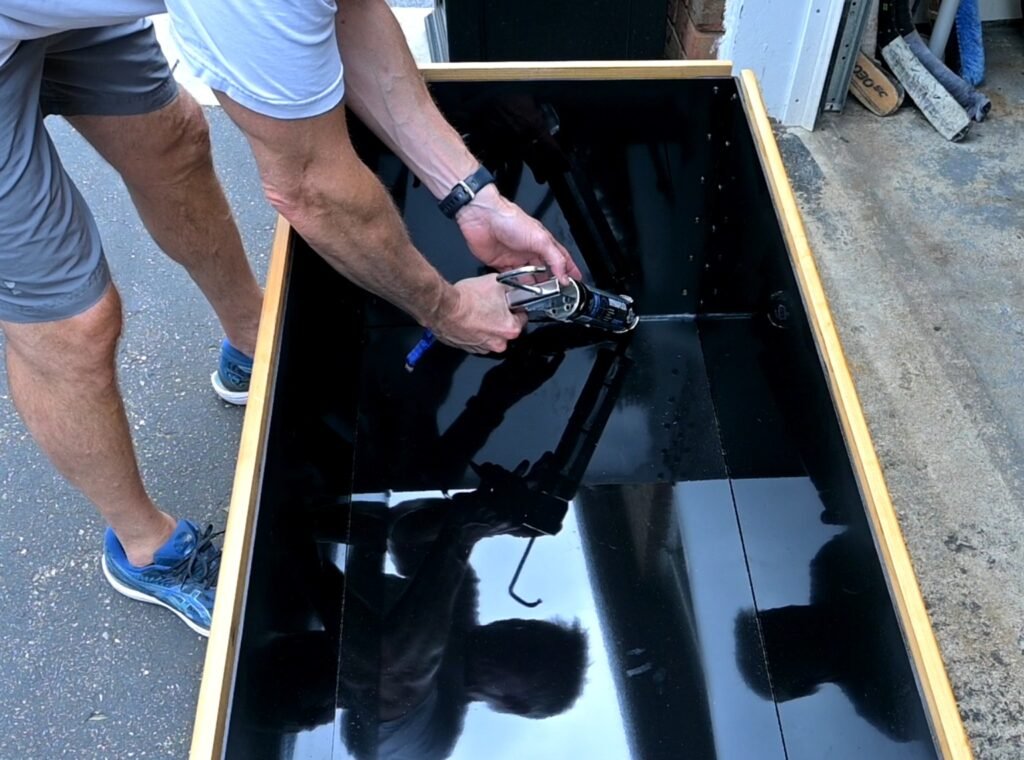
Drainage and Sealing of ACM Box
The base is simply a rectangular piece of ACM that fits the dimensions in the drawing. It will just sit in place on the wood slats.
Assuming you cut everything to dimension and assembled square you should have minimal gaps. I had some gaps which is fine and filled with the Sealing Adhesive as shown in the pic.
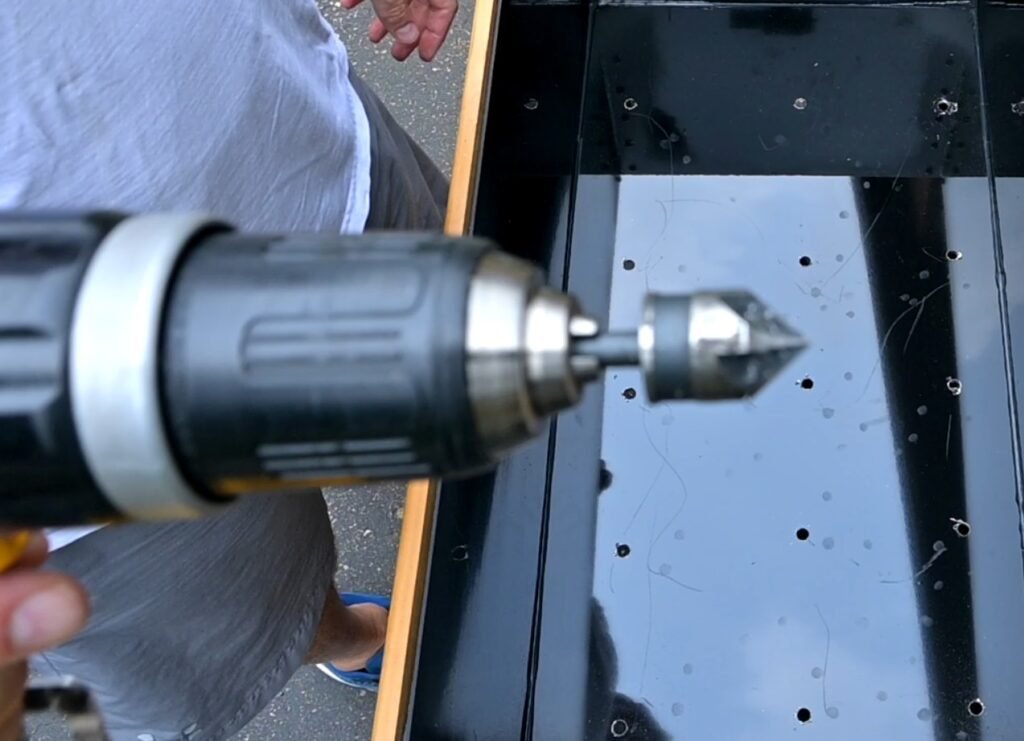
Drainage holes needed to be drilled in the base to allow for water from rain or watering to drain out the bottom of the box.
The ACM is aluminum so you will have burrs after drilling. I used a counter sink bit to clean out the holes.
Time to fill the planter!
You will likely have a planter liner that also sits in this box and will cover up the ACM prior to dumping in the dirt. That’s not my area of expertise though 🙂
As mentioned above, these planters were built two years ago and are still holding up well and still look great. For about $300 (CAD) per box and a couple weekends of work in the garage, this a great DIY project that can test both your Woodworking and Welding skills!
If you are interested in another DIY build, check out this blog post.
Good luck and let me know if you have any questions.